My Blazer Heater Blower Motor Upgrade

My Blazer Heater Blower Motor Upgrade

ThisGuyUKnow

Full Time Jeeper
Posts
2,785
Thanks
1
Location
Harleysville, PA
Vehicle(s)
1986 CJ7 Laredo 4.0,Nv3550,D300 Twin Stick,AMC20 3.31, 31 BFG
Honda vtx1800c
So while I wait on my spacer bolts for the 4.0 head I decided to do the blazer heat blower motor upgrade. I had to pull my dash to more easily install my YJ pedals and I am moving from the Gulf Coast, where an extremely cold winter is like 20 deg F, to Macomb,Il where the winters can get to well below 0.

There are tons of write ups available so I wont be saying anything that isn't already available online.

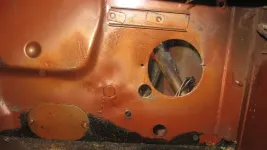
First off I told the autozone monkey I needed the blower from a 1973 Chevy Blazer with a 350 and A/C and I got a siemens motor that seems to match what everyone else is using. Mine had an extra piece of metal around the back of the motor which added about a quarter of an inch to the width of it. I started to cut this piece off but got bored quickly and gave up (My sister's dog has eaten every pair of safety glasses despit my best effort to keep them from him and the sparks kept hitting me in my eyes) So I got a hole saw big enough to fit the back of the motor with the metal surround.

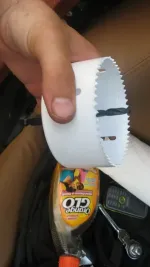
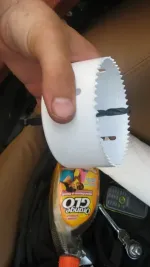
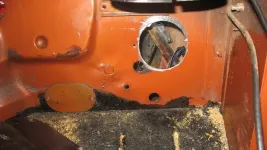
The saw I needed was 3 5/8'' amd ran me 20 bucks at Lowe's plus I had to buy the damn pilot bit which was another 18 bucks (I will be trying to return these tomorrow) In retrospect I regret going the hole saw route over just cutting a hex shape with a dremel. This is because the wood I used to catch the pilot bit just tore up and the hole saw broke loose, chewed up my fire wall, cut my hand, and was generally a PITA. I ended up with an egg shaped hole that was like a pig's butt hair too far over to the right (looking at the fire wall from inside the cab) Luckily I was able to get enough thread on all the studs to thread the bolts on and pull the heater box into place.

Other than that problem, the mount holes on the blower lined up with the original, the shaft fit the original fan with no fuss, and the positive lead that the harness plugs into lined up in the exact same spot. I may have to run a dedicated ground but I won't know until I get the truck wired back up. I did bench test it witht he fan attached and definitely felt like I opened a can of hurricane so I think this may be the ticket....

Overpriced Hole Saw
IMG_0131.jpg
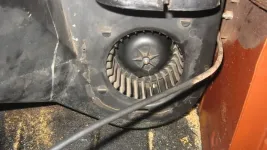
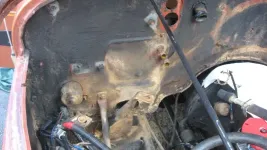
Original motor sticking through firewall
IMG_0125.jpg
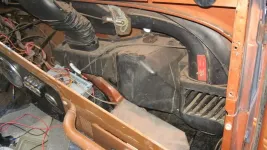
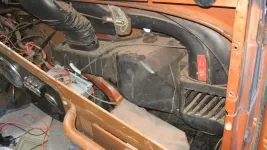
Dusty Heater box
IMG_0126.jpg
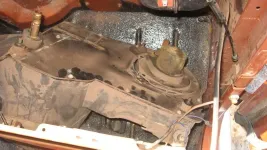
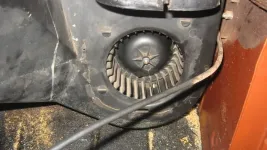
Old motor Exposed
IMG_0127.jpg
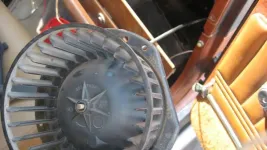
Old motor attached to fan
IMG_0128.jpg
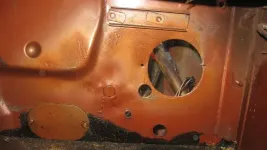
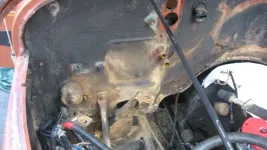
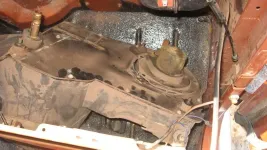
Larger, Egg shaped hole drilled. Notice the carnage to the surrounding area.
IMG_0132.jpg
Handy dandy touch up paint.
IMG_0133.jpg
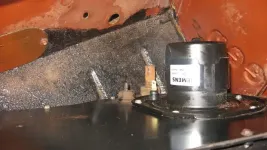
New motor on the heatet box. I also took the opportunity orange glowthe box and the surrounding areas.
IMG_0129.jpg
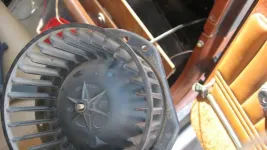
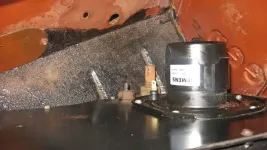
Shot of the new shaft on the blades.
IMG_0134.jpg
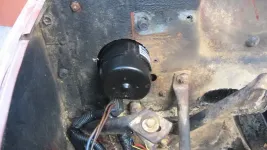
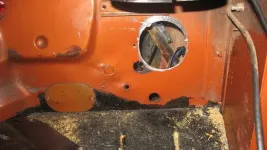
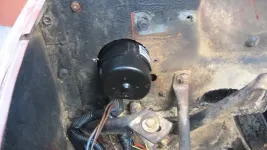
new motor in the fire wall.
IMG_0135.jpg

I will try to rig up the old harness and test out the different settings to compare the air flow tomorrow. Overall this took me about 45 minutes of actual labor. If you still ahve your dash in I would figure around 1 hour and if you you have the on board air to work around I'd say plan for another 30 minutes, unless it leaks and doesn't work like mine and you don't mind just cutting the hoses like I did.
 
Last edited:
Thanks for the pics Guy. I am going to perform this mod to my '86 CJ7 as I have to change out the heater core that shot craps on me the day after I bought the rig.

One question, seeing what you went through with the hole saw, how much trouble would it be to use a die grinder to enlarge the hole? I was considering using a rotary file and running the circumference of the hole until it was large enough to accept the new motor.

Keep up the good work........
 
Well they let me return the hole saw so the whole project only ran me the cost of the motor so that made me less angry. To be honest if you found a stronger piece of wood and a hole saw with a longer bit, and used a variable speed drill I think you will have less trouble. Assuming you can get in there with your die grinder easily then sure that would be easy to do and is one of the suggested methods. However you are not likely to end up with a circular hole if you do it by hand that way. I know I am one to talk considering my hole isn't a perfect circle but if I had used the dremel I know I would have done worse....
 
You did pretty good Thisguyuknow remember it gets hidden by the battery tray...Trapshooter I also have performed this mod I did the rotary file method it worked fine for me I think its a matter of prefrence which way do you feel more comfortable doing :chug:
 
Yeah I know when I put something to seal the firewall you wont even notice. I just like my mods to look like they were stock is all:chug:
 
Any chance you could post the motor part number? My heater box is out so i may as well do the mod!!!:chug:
 
Any chance you could post the motor part number? My heater box is out so i may as well do the mod!!!:chug:

Sure. Just tel the zone monkey that you need a blower from a 73 blazer with ac. I will get you the siemens part number stamped on it in the morning. You know my motor still works if you want it.
 
Sure. Just tel the zone monkey that you need a blower from a 73 blazer with ac. I will get you the siemens part number stamped on it in the morning. You know my motor still works if you want it.

I appreciate the offer but mine still runs too, just want the upgrade,,,,,northern Ohio winters! :)
 
Any chance you could post the motor part number? My heater box is out so i may as well do the mod!!!:chug:
Here is a very good write up on the mod:

Jeep Heater Blower Motor Upgrade

I purchased my motor at Auotzone using P/N PM102 for about $20. Bring a tape measure with you and make sure the shaft is 1 3/16" to the end of the threads.

There is another motor for the Chevy Blazer family with a longer shaft ( PM105, 1 13/16" shaft) that will not work. I've read stories about some people running into the wrong part in the correct box.

I have yet to install this mod myself even though I have all the parts. I have to replace my heater core at the same time. Its going to take me a little longer as I have to remove the roll cage and pull the factory A/C unit to get behind the dash. I will most likely wait until later this summer.

Hope this helps......
 
I need to do this. I'm sure the fan will probably go out one of these days. I've already replaced the core.
 
Here is a very good write up on the mod:

Jeep Heater Blower Motor Upgrade

I purchased my motor at Auotzone using P/N PM102 for about $20. Bring a tape measure with you and make sure the shaft is 1 3/16" to the end of the threads.

There is another motor for the Chevy Blazer family with a longer shaft ( PM105, 1 13/16" shaft) that will not work. I've read stories about some people running into the wrong part in the correct box.

I have yet to install this mod myself even though I have all the parts. I have to replace my heater core at the same time. Its going to take me a little longer as I have to remove the roll cage and pull the factory A/C unit to get behind the dash. I will most likely wait until later this summer.

Hope this helps......

Is your ac unit still working? If not just disconect the two hoses(one at the compressor and one at the can thing,condensor?) and slide them through your firewall. It will only be two or three screws holding your ac to the dash drops right out once you disconnect the ground and the hot lead to it.
 
Guy,

Thanks for the tip on dropping the A/C. The system blows air but the compressor clutch will not engage. The PO told me it was hooked up but I don't think he really knew for sure. Looking the system over I believe it still has the orginal receiver/dryer.
 
Guy,

Thanks for the tip on dropping the A/C. The system blows air but the compressor clutch will not engage. The PO told me it was hooked up but I don't think he really knew for sure. Looking the system over I believe it still has the orginal receiver/dryer.

Well the question is do you have freon In the system or did it leak out?? My system was dry so I removes it the way I said.
 
I did this upgrade today while replacing the heater core. In addition to the PM102 part number for most auto parts stores, if you go to Napa Auto Parts, their number is BK 6551039 (you do not want BK 6551076). I was able to do it without removing the dash (though it would have been easier if I had). I also made the hole larger with careful use of tin snips.
 
i have done this to. throws alot more heat out :D
 
I did this mod years ago, but instead of the Blazer motor, I used one from a '73 Suburban with A/C...Napa part #7135587.

Other then the usual widening of the firewall access, it was a direct swap with the stock squirrel cage. No shaft modification or anything.

Even on low this thing rocks. It moves so much air, that the high setting only pushes marginal heat due to the volume moving past the core.
 
So while I wait on my spacer bolts for the 4.0 head I decided to do the blazer heat blower motor upgrade. I had to pull my dash to more easily install my YJ pedals and I am moving from the Gulf Coast, where an extremely cold winter is like 20 deg F, to Macomb,Il where the winters can get to well below 0.

There are tons of write ups available so I wont be saying anything that isn't already available online.

First off I told the autozone monkey I needed the blower from a 1973 Chevy Blazer with a 350 and A/C and I got a siemens motor that seems to match what everyone else is using. Mine had an extra piece of metal around the back of the motor which added about a quarter of an inch to the width of it. I started to cut this piece off but got bored quickly and gave up (My sister's dog has eaten every pair of safety glasses despit my best effort to keep them from him and the sparks kept hitting me in my eyes) So I got a hole saw big enough to fit the back of the motor with the metal surround.

The saw I needed was 3 5/8'' amd ran me 20 bucks at Lowe's plus I had to buy the damn pilot bit which was another 18 bucks (I will be trying to return these tomorrow) In retrospect I regret going the hole saw route over just cutting a hex shape with a dremel. This is because the wood I used to catch the pilot bit just tore up and the hole saw broke loose, chewed up my fire wall, cut my hand, and was generally a PITA. I ended up with an egg shaped hole that was like a pig's butt hair too far over to the right (looking at the fire wall from inside the cab) Luckily I was able to get enough thread on all the studs to thread the bolts on and pull the heater box into place.

Other than that problem, the mount holes on the blower lined up with the original, the shaft fit the original fan with no fuss, and the positive lead that the harness plugs into lined up in the exact same spot. I may have to run a dedicated ground but I won't know until I get the truck wired back up. I did bench test it witht he fan attached and definitely felt like I opened a can of hurricane so I think this may be the ticket....

Overpriced Hole Saw
IMG_0131.jpg
Original motor sticking through firewall
IMG_0125.jpg
Dusty Heater box
IMG_0126.jpg
Old motor Exposed
IMG_0127.jpg
Old motor attached to fan
IMG_0128.jpg
Larger, Egg shaped hole drilled. Notice the carnage to the surrounding area.
IMG_0132.jpg
Handy dandy touch up paint.
IMG_0133.jpg
New motor on the heatet box. I also took the opportunity orange glowthe box and the surrounding areas.
IMG_0129.jpg
Shot of the new shaft on the blades.
IMG_0134.jpg
new motor in the fire wall.
IMG_0135.jpg

I will try to rig up the old harness and test out the different settings to compare the air flow tomorrow. Overall this took me about 45 minutes of actual labor. If you still ahve your dash in I would figure around 1 hour and if you you have the on board air to work around I'd say plan for another 30 minutes, unless it leaks and doesn't work like mine and you don't mind just cutting the hoses like I did.
thanks for the info
 

Jeep-CJ Donation Drive

Help support Jeep-CJ.com by making a contribution.

Help support Jeep-CJ.com by making a contribution.
Goal
$200.00
Earned
$0.00
This donation drive ends in
Back
Top Bottom