• Hello Guest, we are proud to now have our Wiki online that is completely compiled and written by our members. Feel free to browse our Jeep-CJ Wiki or click on any orange keyword when looking at posts in the forum.
    To dismiss this notice
    click the top right X.

Build Thread The '80 FrankenJeep frame off reassembly

Build Thread The '80 FrankenJeep frame off reassembly
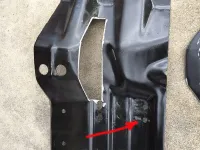
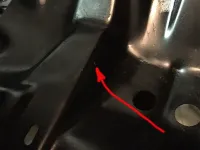
I o got the skid plate issue fixed. Well, actually circumvented. I've never liked CJ skid plates - every Jeep I've ever had they were a PITA. This one was on the Jeep when I got it, and drove it, so I know it fit once upon a time. I did swap frames, but the Jeep is an 80' and the donor frame was set up got narrow track axles so I assumed it would be close enough. Anyway, once I got the engine/Transmission back in, the Transmission mount was about a half inch too far forward by a half inch or so. None of the several combinations of skid plate mounting holes would line up, so I welded up all the holes and slots for mounting to the frame, marked and drilled new holes to maximize the forward mounting position. It was still too far rearward, so I welded up the Transmission mounting holes and drill ed new ones. So far so good. Went to bolt up the Transfer Case , and it stopped 3/16" short. Dammit, man. This is where it was bumping the skid plate:

SRgpFzG.jpg

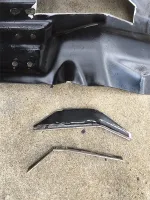
So to fix it, I cut out the surface it was whacking into, cut an extra inch out, and then welded the inclined surface to the forward side of huge cutout, back filling with similar gauge steel.

REmsIwz.jpg

R1tlpPg.jpg

Not sure where the difference in figment came from - the motor mounts went back just they came off, same engine, same Transmission , same Transfer Case ....... Whatever, it's in now and seems to be happy. Rear drive shaft went back in nicely, but in my wonderfully clever method of organization skills, I have yet to locate the front drive shaft. Farts. I'll keep digging.

New Warn hubs go on tomorrow. I had thought about cleaning up the old hubs and reusing them, but I was unable to get the outer portion apart for cleaning and reprinting. Warn couldn't even tell me. They are the old manual / automatic hubs. Gonna clear them outta here since I went ahead and got the new ones.

More later
 
Last edited:
Duplicate Post - Edited out but kept post here for post number maintaining... JR
 
Last edited by a moderator:
After reading my previous post, I think it's safe to say I shouldn't type while sleepy - can't type for :dung:. Plus I've gotten used to my iPad correcting my typos as I go...... Laptop obviously doesn't do that. LOL.
Had a little time this afternoon, so I got the headers back on, the new hubs are in place, and new valve cover gaskets. Guess now it's time for brake and fuel plumbing.
 
That skid plate was probably an earlier model for use with the 70s transmissions and Dana 20 Transfer Case . 80/81 still had narrow track axles but different transmissions and the Dana 300 Transfer Case . That's when the skid plate change came in. Good luck finding the "Farts" (although most people try to ignore or avoid them totally) they tend to fade away never to be found again.
 
Last edited:
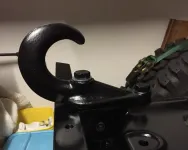
Alrighty - After a long hiatus from this, I dug back in...... Is it a bad thing this has turned into a stress relieving activity?? LOL Anyways, I think I left off with having gotten the drive train back in. I stood back and admired the progress I had made (I like the visual progress.... makes me feel like I'm getting stuff done) shut the lights off and went to bed. Laid there for, oh, 3 or 4 minutes, and it occurred to me I couldn't remember torquing the flywheel bolts. Insert favorite expletive here. As much fun as it was to get the drive train in the first time, I wasn't looking forward to doing it again. So I switched gears and finished up the front bumper / tow hook mounting work. Got that all sorted out, repainted, and then tore the tranny and Transfer Case back out, checked the flywheel bolts (they were properly torqued..... figures), then buttoned everything back up. This time, just before standing back and admiring my progress rewind, I thought it appropriate to add a celebratory barley pop. Halfway thru the CBP, I looked over in the general direction of the tool box, and what might my wandering eyes catch sight of? Leaning against the side of the tool box? Out in the open and not disguised as anything other than what it really is???? (Insert many favorite expletives here - in rapid succession, many compounded together) Why, it's the D*MN BELL HOUSING COVER PLATE!!! You know - the one that goes between the front of the bell housing and rear of the block??? Yeah, that one. At that moment, if I had a garage like many of you, I would have run around and kicked everything I could find..... But as it was, I didn't have the room to raise my leg to kick anything........ Guess it saved a trip to the ER. I set the CBP down, and as calmly as possible, put the cover plate back in it's proper place, got everything buttoned up right this time, then got the CBP out of the fridge. It didn't taste as good that time - it had been tainted with frustration and a dash of stupidity.

Now that summer is here, I will be off for a couple months till school starts back up, so hopefully, if I don't have to keep doing the same stuff over and over, I would like to be driving this thing by Christmas.

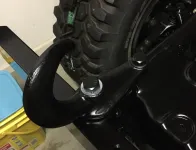
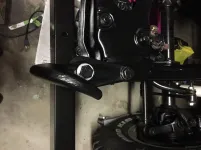
here's a couple pics of the bumper and tow hooks in place - II put the brush guard back on after I took these - I'll add a couple more pics tonight.

duypsYb.jpg

9IIvwM1.jpg

T09OrQi.jpg

9gmH8Tl.jpg
 
Last edited by a moderator:
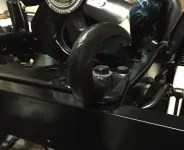
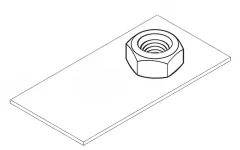
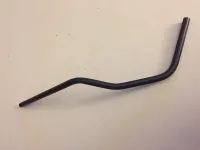
I forgot to describe the rear mounting bolt for the tow hook. At first I was going to just replace rear rear shackle mount bolt with a grade 8 bolt that would extend up thru the top of the tow hook, but decided that wouldn't be a smart thing to do. Instead, I fabbed up a plate with a locking hex nut tacked to it, dropped it into the frame, stuck a thin piece of cardboard thru a hole in the frame that was just forward of the shock mount, ran it forward and fished it out thru the gap between the frame rail and front cross member, stuck masking tape to the underside of the cardboard strip sticking out of the frame back at the shock mount, aligned the tape so that it was below the frame hole, dropped the "nut plate" down thru the frame hole, stuck it to the tape, and pulled the cardboard till the end of the plate came thru the gap. I them removed the plate, ran the bolt thru the tow hook and into the nut, snugged it up, them welded it to the cross member. That gave me a captive nut inside the frame for the rear hook bolt to grab. Unfortunately, I have no pics of that process, but it worked great!!

This is basically what the plate looked like: And yes, the first time I put in place I did so in the orientation shown in the drawing. Had to repeat the process with it "upside down"....... somebody has to be the dummy...

nH5cCAm.jpg
 
Last edited by a moderator:
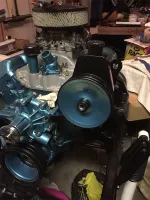
Progress has been slow of late, like a buddy says:"like a cat eatin a grindstone - slow but steady". Got the power steering pump back on, alternator goes on today, then I have to fab up the plate that mounts between the proportioning valve and frame rail. Beats me where I put it, so I'll just make another one. Here's the PS pump....

dLIPwYT.png
 
Last edited by a moderator:
My apologies for not posting anything lately, but the only way I can log in is thru Tapatalk, hardly a favorite of mine. Hopefully one of these days they will get this log in thing squared away. Till then, looks like I'm on a holding pattern. Being old and easily frustrated, probly best I don't try till I can log back in on my laptop. If anyone has any suggestions I'm all ears


Sent from my iPhone using Tapatalk
 
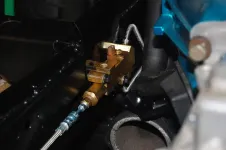
Ok - bit the bullet and have decided to give up the whole login issue and try posting pics thru tapatalk...... Finally got both proportioning valves cleaned up and torn down.... Both looked very nice inside, so I reassembled them and used the nicer of the two. Turns out the PO did in fact install SS brake lines, so a half hour with some degreaser and a tooth brush cleaned em up way better than I expected.

pCr2UkR.jpg

Somewhere during the disassembly and subsequent rearranging of everything in the garage multiple times, I have no idea where the brake line from the prop. valve and rear axle went...... I'm sure I'll find it when I get done :roll: So I had a local hydraulic shop make me a braided line - cost a little more than a hard line, but it saved me a couple hours in a 95 degree garage working out bends.

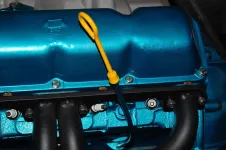
I also finally got the Bulltear dipstick tube seated - nice and snug. New spark plugs installed....

YfGqrbw.jpg

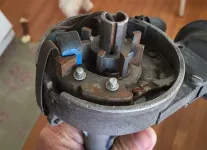
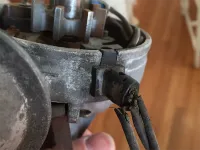
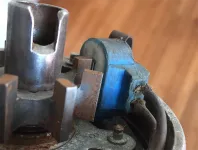
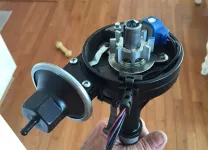
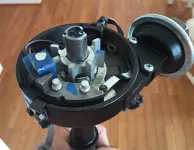
then it was time to deal with the distributor. This is the before shot

pcHbtdC.png

Lams0fR.png

uhYuCFu.png

I have no idea how it ran with those wires like that.
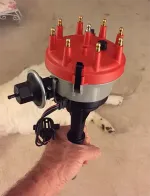
Ordered a remanufactured one along with the TR cap... While I was waitin on the new cap, I got a little carried away with the paint....

8rN2zpS.png

Vfs1ynq.png

I stuck the new distributor in place, tried to turn it by hand, and kinda wigged out - felt like it was locked up. Then realized it wasn't seated all the way..... Wigged out some more. Pulled it back out and verified it was the same dimensionally as the old one... It was. Then realized I had overlooked two small nuggets of info.... The dist gear had engaged the gear on the cam.......no WONDER it wouldn't turn...And the oil pump shaft has to interface with the bottom of the dist. shaft correctly in order for the dist. to seat all the way......... I HATE it when I brain fart like that.......


Sent from my iPad using Tapatalk
 
Last edited by a moderator:
Today I got the adapter and cap stuck on the distributor...... I know, I just wanted to see it together. Makes me feel like I'm gettin stuff done.

bsvc01J.png

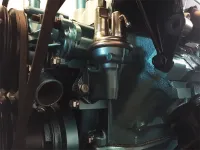
Also got the new fuel pump in place....

vbS9zK1.png

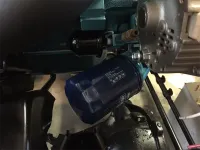
Stuck the oil filter on...

YZaQtCA.png

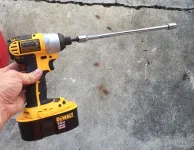
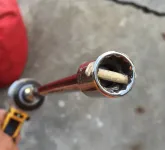
Then stood back and ran thru everything that needed to be in place prior to adding the oil..... Today was "prime the oil pump" day and it appears it's time. Motor all buttoned up, pan and gasket in place, timing cover's good, valve covers in place, same with fuel pump, oil filter, drain plug...... Alrighty - time to prime! If I had a priming tool..... Thought about tearing the old distributor down and using the shaft outta that, but it needs to go back for a core charge and I bet they'd prefer it to be assembled. Screwdriver would be waaaay too slow. Quickest route to a priming tool I could come up with was drill two holes in a 1/2" socket, drive in a bamboo skewer, trim flush, stick on long extension, and viola!

mkiHUn7.png

G0FLQ8b.png

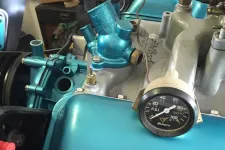
Fit is good, bamboo fits the slot perfectly - okay, here we go. Add 5 qts of oil then eat dinner. Came back out to the garage and already it's marking its territory..... Duh, drain plug was not tight....... Snugged that up and decided it was time. Placed the socket on the end of the pump shaft, verified clockwise rotation, and WHAM - hit the trigger. At that moment I thought "I don't hear anything moving around, wonder if it's gonna HOLY :dung:!!! Where did that oil gusher come from???? Shot outta the block opposite from me, on the passenger side toward the front. Got the shock, tire, wheel, caliper, tool bag, spring and axle, floor..... LMAO. I knew it was going too easy. Walked around to see just where the heck it came from, and there it is..... Plain as day. I bet everyone reading this already saw it in one of the previous pic. Everyone but me. ..... PO plumbed in a mechanical oil pressure gauge, and guess who failed to cap that connection?? So, bad news is I can't really run some oil around in the motor yet, till I cap that connection (and I think I'll use the gauge and plumbing), but the good news is that oil pump primed almost instantly! Bet I didn't run the drill for more than 3 or 4 seconds. I was expecting all kinds of trouble, but it was a piece of cake! All in all not too bad today LOL.


Sent from my iPad using Tapatalk
 
Last edited by a moderator:
Ok - got the oil pressure gauge out of the Jeep, got it hooked up to the motor, and gave it another whirl..... Dang - I think the new pump and stainless end plate did the trick!

DbL7DUr.jpg

Sorry for the video link below - Photobucket's not cooperating today...

http://vid102.photobucket.com/albums...pstaj44ez7.mp4

While digging around in the Jeep last night, I found the starter - Wondered where I stashed it. It's not that old, well, haven't been used that much - that gets cleaned up and installed next.


Sent from my iPad using Tapatalk
 
Last edited by a moderator:
Wow... It's almost scary how clean this is. Awesome work! I'd be afraid to drive it after all that work is done. That's why I'm leaving mine a hot mess... :rolleyes: But that's a great deal of patience you've got there to keep things that meticulously clean!
 
Thanks, Scooter - But don't let the clean fool ya. Same ol parts, I just clean em up before puttin em back where they go (except for the :dung: I've lost due to extraordinary organizational skills LOL). It all started with the donor frame....... Had to clean it up to see what I had, then I had to do something with it once it was clean. Decided to Rustoleum the :dung: out of it figuring I could at any time just add more if I needed to. That and I didn't /don't have the extra funds to get the good stuff. I did coat the inside with internal panel rust preventer though. I figure at my age it will outlive me now. Once the frame was painted I kind hated to put grungy stuff back on, so that's why it's taken so dang long.... They may have to bury me in it if I don't hurry and get it done..


Sent from my iPad using Tapatalk
 
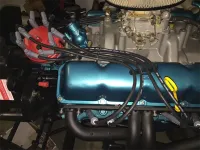
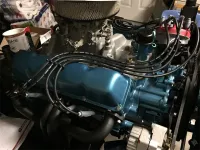
Got a little work done on the plug wire routing. I need to get a couple 4 wire separators for the tabs on the valve covers, but I refuse to pay nearly as much in shipping and "handling" as the item, so these will have to do till I work up a decent size order. Actually, everything is good except the two sitting by the valve cover tabs - those are the only ones getting swapped out. And just for the record, I'd rather have a root canal than try to minimize plug wire contact....... I liked it better when I didn't know any better and just threw em on however they went on. Anyway, here's what I came up with. Also, for the record, these cut to fit wires are a real hoot! Several of em gave me trouble getting the boots back down and over the terminals. They REALLY enjoyed being where they were and did NOT want to leave. I threatened two of them, and the third gave in....


Jqi0vKi.png


gDYCZE5.png
 
Last edited by a moderator:
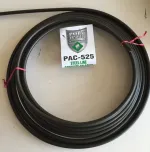
Since I got the brake lines all run, I figured it was time to get the fuel lines run. The old line was pretty rusty and I figured it needed replacing. I made that decision right before I cut the rotten frame up, so after the cutting was over, that pretty well sealed the deal for new fuel lines. Stopped by Autozone and picked up a roll of Poly-Armor 5/16 line and a fitting to screw into the outlet of the fuel pump.

T4G1qEl.png

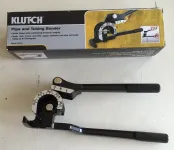
Also picked up a cheap tubing bender - since I wasn't planning on doing this very often, if an $18 bender gets me thru this build I'm happy. But at 18 bucks I wasn't expecting much.

GV9VXzq.png

Sat down as soon as I got home and tried a 90 degree bend.... This thing actually works well. Stepped out into the garage to eyeball where the dare line needs to go between the pump and filter..... Determined it was much too hot to work out there (yeah, I'm a wuss) so I came inside and bent one up based on what I remembered it needing to look like. First attempt was close but hit the steering pump bracket. Second on fits like a dream - this may not be so bad after all. Tomorrow I'll flair it and see if it really does fit....

Here's the second try

txQ8KzJ.png
 
Last edited by a moderator:
Just remember to put the ends on before you flair them. Don't ask why I'm saying this :eek:
 
I have that tubing bending tool. It works really well for me, too.

-Jon
 
I have that tubing bending tool. It works really well for me, too.


-Jon


LOL - Wonder if they make one that will bend 2" DOM ????

That would be better than going to the gym :smile:


Sent from my iPad using Tapatalk
 
Nice work, of course we've become accustomed to that from you. :D That engine is so sweet. :drool:
 
Been busy rebuilding a screened porch - that SERIOUSLY cuts into Jeep time....... About all I've gotten done is flaring the fuel line - can't wait to see if it leaks or not LOL

GrMwbPN.jpg

Mtnwhlr - I remembered the fitting too
 
Last edited by a moderator:

Jeep-CJ Donation Drive

Help support Jeep-CJ.com by making a contribution.

Help support Jeep-CJ.com by making a contribution.
Goal
$200.00
Earned
$25.00
This donation drive ends in
Back
Top Bottom