Build Thread The '80 FrankenJeep frame off reassembly

Build Thread The '80 FrankenJeep frame off reassembly
I'm thinking he's out wheeling it and didn't even let us know
 
I'm thinking he's out wheeling it and didn't even let us know
You done anything on your Jeep lately?

Uh, no and no..... Even tho I don't get summers off anymore, I somehow haven't been able to shake the summer jobs..... only thing I've done to the CJ lately is install a new soft top. Which reminds me - I need to list the old one and see if I can sell it.....

Sent from my iPhone using Tapatalk


It's like coming home again!!! Via Tapatalk
 
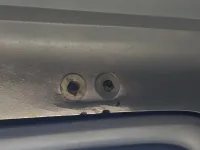
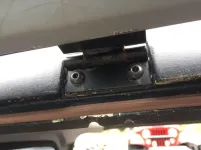
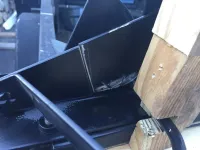
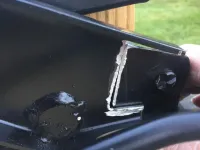
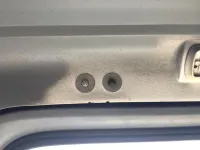
Alrighty - Just started on a summer project I never started during the hot weather... Figured I’d better get on it. The liftgate hinge bolts that attach the hinge to the top we’re all fubar’d when I got the top - thru bolts and large washers were being used. That prevents the bolts from actually holding the hinge in place - keeps riding up. Not to mention it crushed the inner wall of the top on the driver’s side.

9c9664508a133ce0d5344c2649b6f4ba.jpg


c02933c1992ab709e902d05655305611.jpg

Was pondering on the best way to fix this. So far my leading theory would be to cut a couple pieces of steel maybe 6” wide and a couple inches tall, drill two holes large enough to pass a 3/8” steel tube thru, and align with where the bolts need to be at the hinge. Tack weld the tubes to the plate on the inner side, then once welded in place, trim tubes to act as crush limiting sleeves between the hinge and reinforcing plate. Drill thru the gasket flange in a couple places and use countersunk screws to hold the plate in place, attaching the plate to the top with Evercoat Fiber Tech. Once all cured, lay a nice smoothing coat to blend the plate into the inner surface of the top, painting to match the rest of the inside surface.

Now, I know I’ve been accused of doing :dung: the hard way in the past, so let’s here some easier ways to fix this that will fix my proble

Oh - one of my gripes has been the hinges are slotted where it interfaces with the top. I would prefer to make those holes instead and fix the hinge location......


Sent from right here.......
 
The hinges on mine are steel...so you could weld up the open slot and re drill as a fixed point...and..if you can push out the top deformation...I would cover one side holes and inject resin into the void..should be able to create a solid core at the hinge point..jmho..happily ..mine was still good...
 
The hinges on mine are steel...so you could weld up the open slot and re drill as a fixed point...and..if you can push out the top deformation...I would cover one side holes and inject resin into the void..should be able to create a solid core at the hinge point..jmho..happily ..mine was still good...

That’s the plan for the hinges- but as for the deformation - it must be hollow at the spot? I thought about reinforcing the interior area, but wasn’t sure if it was just dead air........ hard to get a structurally sound filler in there with nothing to make it stay. And I didn’t want to cut into it if I could help it.

Wonder what’s inside there??? Did they all have they bolts there or was there a blind nut setup inside that’s broken loose...


Sent from right here.......
 
Pretty sure the captive nuts were imbedded..or possibly threaded fibreglass ...less likely..
 
could always use hi density expanding foam..that may well get you enough support
for through bolts
 
Did some pokin around yesterday - took a 5/16-24 tap and hit the holes.... not sure why the PO had used 1/4-20 screws, but the 5/16 tap threaded the inserts that were in there. Before I fix the holes on the inside, I'm gonna torque the bolts pretty good and make sure the inserts are still structurally strong enough. At that point, I will either repair the inner surface and paint, or, if the inserts don't seem to wanna pull their weight, I'll drill a hole over the back side of each bolt, run a nut onto the end of the bolt, and lock tho bolt in that way. If I size the hole correctly, I can get a socket in there, then hit the hole with a hole plug...... initial reassembly shows the inserts appear nice and solid. Repairing the slots in the hinge is next.

0d514f8a73c44ccda6bd363bdb182546.jpg

Now, I know I had started out making backer plates, crush tubes, and big dealing the whole process, so I apologize for taking the easy road..... LOL


It's like coming home again!!! Via Tapatalk
 
Unless there is scenery to see, usually the easy road is best. :punk:
 
Thought I’d bring this thread back from the dead.......

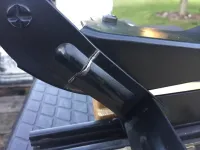
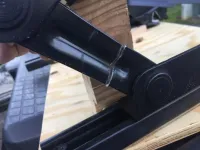
Waaaaaay back when I bought the Jeep, I was just gonna paint it and swap the seats. Last year I picked a pair of front seats from a Liberty - got the driver’s seat in. Decided 8 years was long enough so today I started on installing the passenger seat.

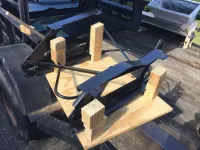
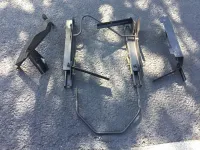
Been pondering this for a few days....... I wanted to keep the folding seat bracket, but the seat needed to be lowered 2 “ (the Liberty seats have a deeper frame.) The driver side brackets were fixed and easy to shorten, but the folding base had me scratching my head. Made one out of cardboard, shortened it, and it worked fine. But how to hold everything in place once cut apart?

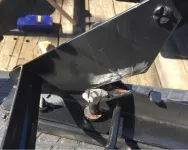
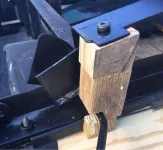
Made a fixture holding the base in place upside down. Removed the 4 “posts” holding the base secure, removed 2” from each, reattached the posts, and commenced to hacking up the frame.

7299775833ec9951e6b9070faa8d2285.jpg

22619ffa24541e541b51265a437731cf.jpg

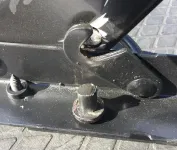
Part of the pondering was trying to decide what to do with the latch posts ...... so I cut em off

ed4ed7d6c797b9a6744dc48066c23cd5.jpg

6b3f893030c10b852ea033e5d27f9acc.jpg

And will drill new mounting holes and weld em back on in their new spot.

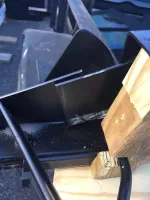
After mounting all the pieces back to the fixture, I overlapped the cut pieces and cut the excess off to prepare for welding back together.
359cc2e8da424a490008eb7ef4ac1aee.jpg

c1a80254aaa8ea514364accaad704502.jpg

e0eff160d4f5c37f4f13b14f50159129.jpg

3cdf197a681a6877dcd18ab688f3c8d1.jpg

a62ede570d627f25748a47c989669beb.jpg

44b760f69d15647a4f1f845704da5314.jpg

Now all I have to do is weld everything back together.

Can’t wait to see if it’s gonna work!


Sent from my iPhone using Tapatalk
 
Interesting. I need to do the same thing for my seats.
 
Super job ! Is that the frame from a YJ or CJ ? Looks slightly different.
 
Man, I’ve been pondering this for a year, was either lose some weight or modify this seat bracket but still try to maintain the fold forward... a year later, still pondering how to cut the brackets


Sent from my iPhone using Tapatalk
 
Super job ! Is that the frame from a YJ or CJ ? Looks slightly different.

That is a YJ bracket - It what was in there with the YJ seats, and I didn’t have the heart to cut up my CJ bracket.


Sent from my iPhone using Tapatalk
 
Man, I’ve been pondering this for a year, was either lose some weight or modify this seat bracket but still try to maintain the fold forward... a year later, still pondering how to cut the brackets


Sent from my iPhone using Tapatalk

I hear ya - that’s why it’s taken me so long to swap it........ Wasn’t looking forward to this, but finally got tired of stepping around the seat in the basement. As for the cutting - a couple cardboard mock ups says it’ll work. With the geometry involved, reducing the height by 2” only required removing a little over an inch of material...... The front riser pieces and cross braces are a piece of cake - but the rear risers need the latch pins to be relocated. They will be situated after everything else is welded up. Drill a mounting hole and weld both sides.....Stay tuned.....


Sent from my iPhone using Tapatalk
 
Over on the CJ8 forum there is a great write up with diagram and pictures and measurements on cutting and welding the brackets.
 
Well, let’s see if I can sneak back in here and toss an update on here…. Been an interesting, frustrating, and joyous few months. I’ll get the ball rolling, then add more later. Early November, clutch started slipping, so I ordered a new clutch setup from Rock Auto, and took everything to a buddies wood stove heated garage and swapped it out. Fast forward to early Feb…… Drove out to the DMV to renew my drivers license, was almost home, and when I pulled away from a red light, it sounded like the pressure plate was scraping the inside of the bellhousing. Not possible, I know - but that’s what it sounded like. Dropped everything aft of the engine, found a rotten throw out bearing, so I thought “ this won’t be too bad. Since that was my first purchase from Rock Auto, I blamed the clutch set. Picked up a new one from Napa, grabbed the throw out bearing to see if that was the source of the noise. Nope. Still scraping and knocking around. So I dropped everything aft of the engine, again, and replaced the rest of the clutch set. Put everything back together and fired it up. Noise was a little different, but still there. Dropped everything aft of the engine, again, and decided to start it with nothing but a bare flywheel, then add one piece at a time till I found the culprit. Cranked it up, and viola - a bad rod knock…… And there was my first WTF moment.

Ok - time to crash. I’ll add more tomorrow …. With pics 👍

Had to add this - Wanted to give everyone time to come up with ways to tell me I’m stupid…… It’s coming - I can smell it LOL
 
Not us . What a dragggg.
 

Jeep-CJ Donation Drive

Help support Jeep-CJ.com by making a contribution.

Help support Jeep-CJ.com by making a contribution.
Goal
$200.00
Earned
$25.00
This donation drive ends in
Back
Top Bottom