• Hello Guest, we are proud to now have our Wiki online that is completely compiled and written by our members. Feel free to browse our Jeep-CJ Wiki or click on any orange keyword when looking at posts in the forum.
    To dismiss this notice
    click the top right X.

Build Thread 79 CJ7 "They’re coming to take me away aha"

Build Thread 79 CJ7 "They’re coming to take me away aha"
I had the same questions about vacuum advance. I think that by the book, Posi is right but in some situations manifold vacuum is better because you can get quicker advance if that's what you need. I switched mine from ported to manifold and I could tell a difference in throttle response.

I think that the situations where manifold is better is when you're trying to compensate for something else regardless of whether you should be or not. In my case, I'm tuned for 10,000 feet but I'm sitting 400 feet. When I actually get to 10,000 feet, I might decide I'm not set up to where I need to be. .


Sent from my iPhone using Tapatalk
 
I was simply posting to let him know he was checking engine vacuum at the wrong port (if the distributor advance was set up to factory specs).
 
I was simply posting to let him know he was checking engine vacuum at the wrong port (if the distributor advance was set up to factory specs).


Hey no I didn't mean to come across that way... You're exactly right, I just meant to give an example of manifold vac. My apologies.


Sent from my iPhone using Tapatalk
 
Not a problem, I didn't feel my first post was clear enough.
Oh, I'll give you a call tomorrow on what we talked about.
 
Not a problem, I didn't feel my first post was clear enough.
Oh, I'll give you a call tomorrow on what we talked about.


10-4


Sent from my iPhone using Tapatalk
 
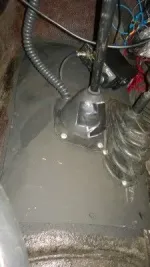
[FONT=&quot] This is the Transmission hump before we lowered the engine and driveline almost 4” back to where they belonged.


WP_20150411_002%20Custom_zpsrbzc68gq.jpg[FONT=&quot]
[/FONT]
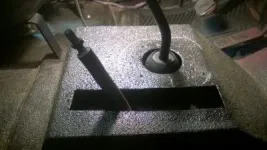
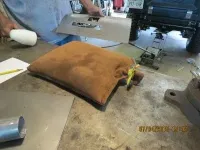
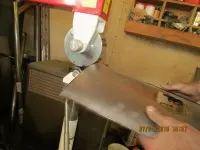
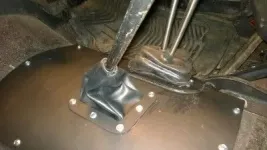
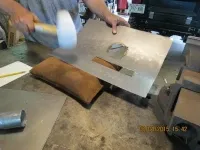
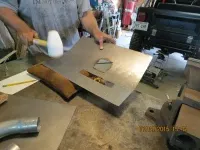
Although there is no time for anything fancy, we still need something to cover the big hole in the floor where the PO had built an elevated “dog house” to accommodate the improperly installed engine and Transmission . We got out the grinder and somewhat leveled the Transmission hump so we could make a temporary cover. I cut a rough piece of 18ga sheet metal and cut out for the shifters. To begin making the curve to fit around the hump, I first used a few different radius bossing mallets and a sand filled leather bag that oldjeeplady made for me.[/FONT]


IMG_0002%20Custom_zpslzjo4lm2.jpg


IMG_0003%20Custom_zpsb6lv6vzh.jpg


IMG_0004%20Custom_zpstilxeflh.jpg


IMG_0011%20Custom_zpsfu9qk2fx.jpg

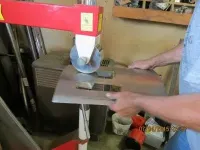
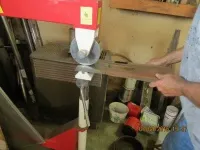
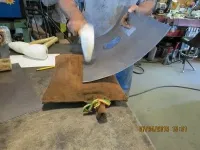
[FONT=&quot]Once I had beaten the panel into roughly the shape that I wanted, I ran it through an english wheel in order to smooth out the “walnuts” in the panel.[/FONT]

IMG_0014%20Custom_zpsoyulde9r.jpg

IMG_0015%20Custom_zpszj3uotnv.jpg


IMG_0016%20Custom_zpslvcfjplv.jpg

[FONT=&quot]Not pretty, but a little paint, and we are ready to go for now.[/FONT]


WP_20150718_003%20Custom_zpstvducy1s.jpg

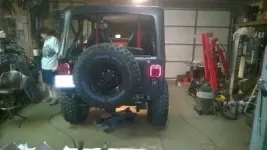
[FONT=&quot]The spare tire carrier is now finished and mounted.[/FONT]

WP_20150717_004%20Custom_zpsgwh6tlpz.jpg


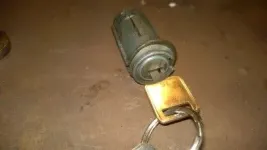
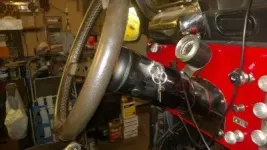
[FONT=&quot]The ignition key did not have the usual “wings” that a column mount key would have. Actually, it used to have the wings, but the PO broke them off. Getting the old tumbler assembly out was a bit of a trick since the old one had been forced in. :mad:[/FONT]


WP_20150717_002%20Custom_zpsff96fhhm.jpg


WP_20150717_003%20Custom_zpsy575hkuy.jpg


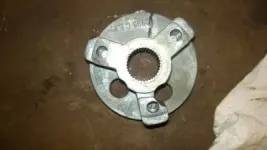
[FONT=&quot]I had a real eye opener when I removed the steering wheel to access the tumbler assembly. The PO did not use the correct nut and washer to hold the steering wheel to the splined shaft. The nut was smaller than the hole, and the 3 holes in the wheel adaptor were stripped! :eek: One good tug and the wheel would have come off! And I was driving this thing at 60mph?? :oops:[/FONT]


WP_20150717_001%20Custom_zpshmg2poob.jpg


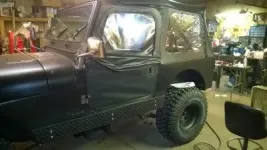
[FONT=&quot]We next fitted the full doors up, but had to make larger catches for the latch to make the doors close securely.[/FONT]


WP_20150717_005%20Custom_zpsw1xq5rcl.jpg

WP_20150717_006%20Custom_zpso0pglozx.jpg


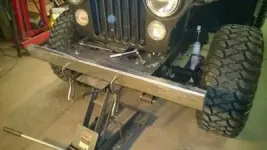
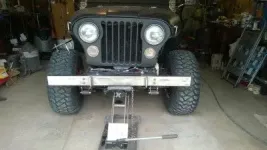
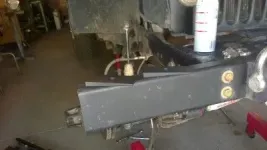
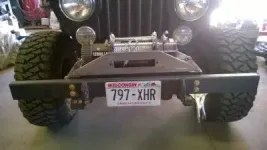
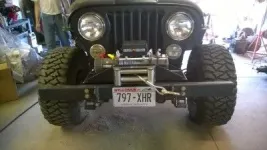
[FONT=&quot]I would like to make a nice bumper and incorporate the winch into it, but with time growing short (we leave for Ouray in 6 days) simple will have to do for now. I used 2 x 4 x 3/16 tube, and attached shackle tabs to use as tow points.[/FONT]

WP_20150718_001%20Custom_zpsajmnai9n.jpg

WP_20150718_002%20Custom_zpscluh59zo.jpg

[FONT=&quot]The paint is drying, and the bumper will be mounted tomorrow.[/FONT]
[FONT=&quot] WE MADE IT! :banana::driving:
[/FONT]
[FONT=&quot]Off to Ouray next week. At least we did get the jeep on the road a few weeks ago, so there are miles on it. Not going out cold turkey![/FONT]
 
Awesome work. So so happy for you both! It's been a long time coming eh?

It's gonna be a great trip!


Sent from my iPhone using Tapatalk
 
Said it before , "I love your shop." When I needed to bend a Transmission cover I used my thigh (leg). When you need to do the same thing you just go to your handy ENGLISH WHEEL. OMG that is a well equipped garage.

You've gone a long way, and have a well equipped jeep in very little time, very impressive indeed. I hope you have a memorable week in Colorado.
 
Well done!
 
You two should be proud of what you accomplished in such a short time. That was definitely not a "turn key" CJ to say the least. Great work and can't wait to see the trail ride here. :D
 
You two should be proud of what you accomplished in such a short time. That was definitely not a "turn key" CJ to say the least. Great work and can't wait to see the trail ride here. :D
Definitely not turn key! Maybe we should see if Chip Foose needs help on "Overhaulin";) I never thought we would make it in the amount of time that we had.
 
And the news keeps getting better! (really!) I checked the alignment today and found that the toe was set at almost 1/2" toe in. Set it around 1/16 to 1/8 toe in and that made a great improvement in the "wandering" while going down the road.
 
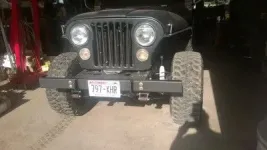
[FONT=&quot]I guess there will be little tweeks going on right up to departure time, so I will do my best to keep adding to the thread. The bumper is now mounted and ready to go.[/FONT]


WP_20150719_002%20Custom_zpsz7q7oama.jpg

[FONT=&quot]I noticed an oil leak from the Transfer Case . I thought it was the rear seal, but it turned out to be the vent on the top of the tail shaft. The breather is pressed in, and I just don’t have the time to thread the hole and put in a nipple and vent hose, so I did the next best thing. I pulled the breather out and removed the cap. Then I ground off the lip that held the cap on. Turns out that it is now exactly the same size as a 5/8” heater hose. I attached the heater hose and ran it all the way up to behind the battery. Now, deep water will not be a problem since the Transfer Case vents in the engine compartment. :D[/FONT]


WP_20150719_003%20Custom_zpsxyszluvf.jpg

[FONT=&quot]We decided to install a fan shroud for better cooling. Good ol’ “almost fit ADA”, but a little trimming, and all was well.[/FONT]
[FONT=&quot]
[/FONT]
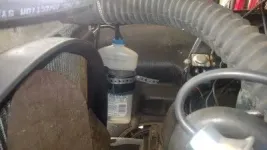
[FONT=&quot]How about that great after market radiator over flow container? :DThank you Mr. Clean! Not enough time to have one shipped, so what the hay! It works![/FONT]

WP_20150719_001%20Custom_zpsrkncqedd.jpg

[FONT=&quot]Tomorrow is the last day to do anything because Tuesday is our load up day, but there is really not much more to do. (did I really just say that??) well, at least nothing pertaining to the trip.When I get home from work on Friday, it’s off to Ouray![/FONT]
 
[FONT=&quot]We won’t be doing a lot of work on the Jeep until this winter, but here are a few updates to the build.[/FONT]
[FONT=&quot]
[/FONT]
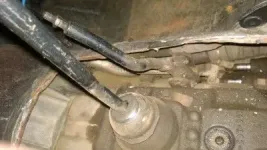
[FONT=&quot]We had a blast in Ouray! Our Jeep performed nearly flawlessly, nearly being the key word. We had problems on some of the trails that had a lot of loose rocks. We kept on getting stuck. :mad: We initially thought that it was too much pressure in bran new tires. Not the case. We just had to wait at the bottom of the trail for the others when things got too tough. One day the rest of the group went off to do Black Bear road, but still being a novice, oldjeeplady and I decided to do Imogene pass by ourselves. We got half way up the mountain and got stuck. :mad: Another Jeeper behind us told us that our rear tires were doing nothing, only the fronts were spinning. I knew that the shifter was pretty loose and worn. What I did not know was that the PO had removed the pills in the Transfer Case in anticipation of converting to a twin stick, but never finished.:censored: Figures! The only part of the drive line that I did not take apart! I guess we were pretty lucky that the Transfer Case worked as well as it did.
[/FONT]


WP_20150822_001%20Custom_zps4ixrlubm.jpg

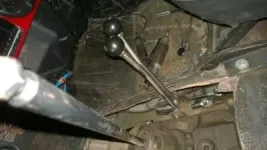
[FONT=&quot]New twin stick in place, and all is well![/FONT]

WP_20150822_003%20Custom_zpsnmibp6hs.jpg

WP_20150822_002%20Custom_zpsea3mpjjc.jpg

[FONT=&quot]As I had mentioned earlier in this thread, the Jeep wanders all over the road. Anything much over 40 mph, and it was white knuckle time. We tried several possibilities, but nothing helped much. Then quite by accident, I was reading about something totally unrelated on one of the forums, and the topic was castor angle. A little light went on over my head, and I felt like a total idiot. :bang: (When in my 20s, I was a front end mechanic) [/FONT]
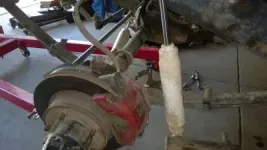
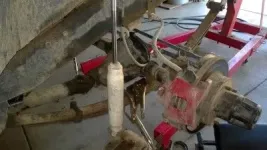
[FONT=&quot]Axles out one more time.[/FONT]

WP_20150912_001%20Custom_zpsvjtweans.jpg

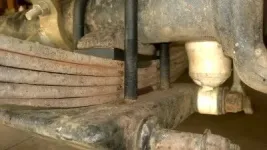
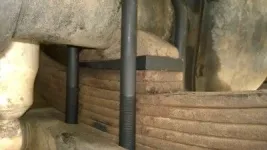
[FONT=&quot]We had to put in longer spring center bolts, so we clamped the leafs together before removing the bolts to avoid playing 52 pick up with the leafs.


WP_20150912_002%20Custom_zpsaq9oqzsl.jpg

[/FONT]
[FONT=&quot]4 ° shims all painted up and ready to go in.[/FONT]

WP_20150912_003%20Custom_zpslhrisqd7.jpg


[FONT=&quot]Shims installed giving us a 4° positive castor angle instead of 0°.[/FONT]


WP_20150912_004%20Custom_zpsf0vo9uw2.jpg


WP_20150912_005%20Custom_zpscem4ou6z.jpg


[FONT=&quot]What a difference! :) I took er out on the road, and I didn’t feel like I was going to end up in the culvert. After making a turn, the steering wheel almost returned to the straight position instead of just staying in the turn position. Before, 40 mph was scarry, now, 60 mph is possible before having to get a death grip on the steering wheel. 4° is good, 6° will be great! That will be a project for this winter. With 4.56 gears, 60 mph is screaming for the engine anyway, but another 2° is going to make the Jeep handle the way it did when it was new.[/FONT]
 
[FONT=&quot]Soft top repair[/FONT]
[FONT=&quot]
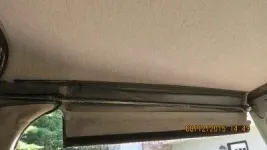
When trailering the CJ to Ouray we had some problems with the flaps above the doors coming loose. The design of our top (Bestop) has some padding sewn in with some plastic reinforcement to provide a better seal with the upper soft doors. At first I couldn’t decide if the padding belonged inside or outside of the top frame. We decided it must go outside the frame.

[/FONT] [FONT=&quot]Driver side flap outside

driv%20side%20door%20flap%20Custom_zpsayf0otg3.jpg

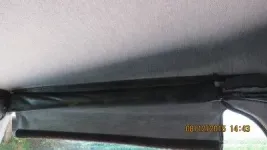
[/FONT] [FONT=&quot]Pass side flap outside[/FONT]

pass%20side%20door%20flap%20Custom_zpsvopk1oqp.jpg

[FONT=&quot]Pass side flap inside[/FONT]

pass%20side%20door%20flap2%20Custom_zpscgyf2tez.jpg

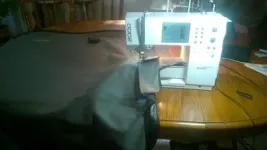
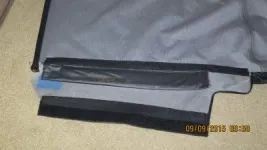
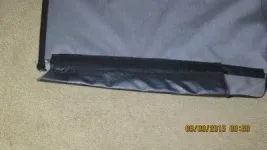
[FONT=&quot]The loop (fuzz) side was 1 in wide and the hook (stick) side only ½ inch wide. I decided to replace all the velcro with 1 ½ inch wide. I would have to add some fabric to the door flaps to accommodate the wider velcro. I used one of my home machines, heavy polyester outdoor thread and size 18 leather needle. To use this thread with a home machine I had to reduce the bobbin tension and increase the thread upper tension.[/FONT]

WP_20150920_001%20Custom_zpssfn7eyq8.jpg

WP_20150920_002%20Custom_zpsxeqygtye.jpg


[FONT=&quot]Here is the drivers side flap after the wider velcro was installed.

[/FONT] [FONT=&quot]Door flap open[/FONT]

new%20velcro%20pass%20side%20Custom_zpsmmtcfd4b.jpg


[FONT=&quot]Door flap closed[/FONT]


new%20velcro%20pass%20side2%20Custom_zpspbxznevd.jpg


[FONT=&quot]I also replaced the narrow velcro on the door flaps on the side windows.[/FONT]
[FONT=&quot]Time will tell if the wider velcro will hold the door flaps in place when trailering. Another option suggested by Torxhead was to add snaps on the door flaps, and I may do that if the new wider velcro does not hold.[/FONT]

[FONT=&quot]Transmission Shift boot and trim ring construction[/FONT]

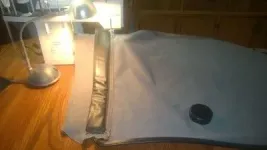
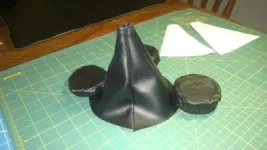
[FONT=&quot]The Transmission shift boot was torn so I decided to make one. I was going to use leather, but after doing some research decided on cold weather naugahyde like what would be used on a snowmobile seat. [/FONT]
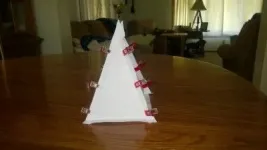
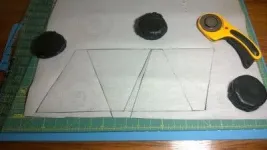
[FONT=&quot]I made a paper pattern first to get my size correct. It took several tries. The base opening ended up at 4 x 5 inches with another ½ inch of material for the base and approximately 5 inches tall.[/FONT]

WP_20150919_001%20Custom_zpsi0jdzboy.jpg


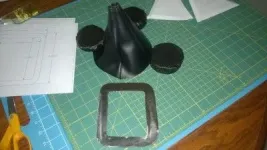
[FONT=&quot]I traced the pattern on to the naugahyde and cut it with a rotary cutter. Before sewing the sides together, I sewed the tops back flat to the inside at a distance that would allow for the circumference of the shift rod when assembled. I then sewed the sides with the boot inside out. Next I turned the whole boot right side out and trimmed some of the seam allowance. The round back objects are leather covered weights.[/FONT]


WP_20150919_004%20Custom_zpshkgsm7wl.jpg


WP_20150919_005%20Custom_zpsb3cs0foz.jpg


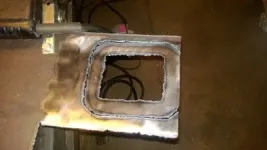
[FONT=&quot]My husband made a paper pattern in CAD and then cut a metal trim ring. It was shaped, holes drilled for the boot and then painted.[/FONT]


WP_20150919_006%20Custom_zpsvgqh2msu.jpg


WP_20150919_007%20Custom_zpseowsjb8k.jpg


[FONT=&quot]My husband also made a trim ring for the Transfer Case twin stick boot that came with the JB Fab twin stick kit. The trim ring that came with the kit was stainless and needed a flat space to install it properly. So here are the shifts boots and trim rings installed.[/FONT]


WP_20150928_001%20Custom_zpsopckwrbp.jpg

[FONT=&quot]I was very pleased with how my naugahyde shift boot turned out. I tried to include enough detail for anyone that wants to make their own. The naugahyde does stretch some and so far proved to be a better choice than leather.[/FONT]
 
As always, great post! Love the boot, I'm going to need to do one myself. The new replacement boots, one of which I have, simply don't last. Mine cracked in less than 6 months.

How do you like your Twin Sticks? Love mine. No more fighting with the Transfer Case and barking up my knuckles. I still have my pills in place so shifting needs to be done in perfect order, but no matter. A short movement of the levers gets the job done, quick and accurate.
 
Well done. Looks great!


Sent from my iPad using Tapatalk
 
:chug:
 
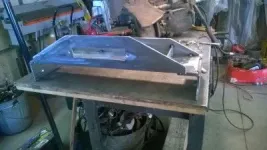
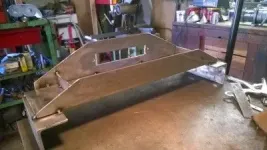
[FONT=&quot]We have not had a lot of time to do much on our build since the Ouray trip last August. I am still recovering from knee surgery done in early October, but a few weeks ago I decided, since our son volunteered to help, to mount the winch. The part I really needed help with was anything involving getting down on my knees. We have spent many hours on this project down on our knees, mostly praying to the Jeep gods (and the real one) for just one thing to go right! :bang: Since I could do the fab work and welding while standing or sitting……………away we went![/FONT]


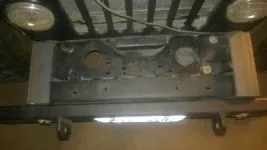
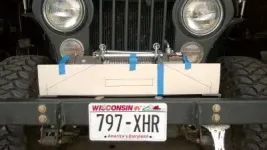
[FONT=&quot]First step was to make a template to cut the steel from after cutting and attaching 2 pieces of heavy angle which were bolted to the frame.[/FONT]


WP_20151113_004%20Custom_zpsmznmp26z.jpg

WP_20151111_001%20Custom_zps4ksjjixv.jpg

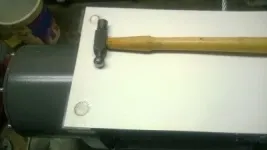
[FONT=&quot]The easiest way to make the template for the base, since one was not provided with the winch, was to cut a piece of poster board the same size as the base plate and gently pound around the winch mounting holes with a very small ball peen hammer that I normally use for chrome trim restoration until I had broken through the poster board with nice precise holes.[/FONT]

WP_20151113_005%20Custom_zpsosk7apn0.jpg
[FONT=&quot]
I then transferred the base and front templates to the steel and cut them out.


WP_20151113_006%20Custom_zpsdvqqm7di.jpg


WP_20151113_008%20Custom_zpscrsq2gen.jpg

[/FONT]
[FONT=&quot]Tack everything together, checked for fit with winch and frame, and weld it all together.[/FONT]

WP_20151114_005%20Custom_zpsnxzw9376.jpg

WP_20151114_006%20Custom_zps4viuagkf.jpg

WP_20151114_004%20Custom_zpscf3oeol3.jpg

[FONT=&quot]A bit of paint, a little wiring, and the project is done.
[/FONT]


WP_20151115_003%20Custom_zps60q2m5qt.jpg

[FONT=&quot]I know it’s not a Warn or other name brand winch, but what the heck, for under $300 with a 12,000lb capacity, we can live with Badland! Besides, I would rather be out $300 if someone decides to “borrow” :rolleyes: it without our permission than over $1000 for the name brand. It works fine, and I am sure it will serve our purposes.[/FONT]

[FONT=&quot]Next addition will be for oldjeeplady to make a cover for it.[/FONT]
 
Well done!
Hope for a speedy knee recovery.
 

Jeep-CJ Donation Drive

Help support Jeep-CJ.com by making a contribution.

Help support Jeep-CJ.com by making a contribution.
Goal
$200.00
Earned
$25.00
This donation drive ends in
Back
Top Bottom