Build Thread Project Scrambled - The Diesel Powered CJ-9?

Build Thread Project Scrambled - The Diesel Powered CJ-9?
Give me an old Kaiser Jeep, this thing will eat rocks for breakfast and :dung: out a condominium lol.
View attachment 77892
Hmmm, new idea, re-create old Jeep/Willy/Kaiser trucks, take some serious steel and a close truck donor, maybe start with an 80's D250 or heavier. I need to be about 20 yrs younger lol.
Got a brother born in 76...I graduated high school in 79🫣

":dung: out a condo" 🤣🤣🤣
Love me a Kaiser!
 
Last edited:
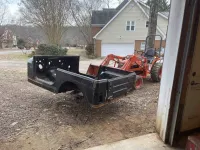
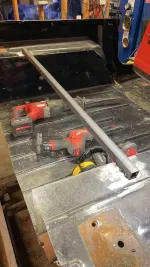
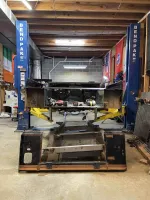
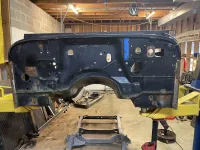
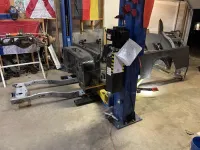
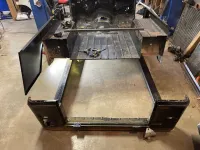
Tub is on the lift. Started chopping the back end off the tub to stretch it. Then got the new frame back from being sand blasted. So putting the tub aside (well lifting it up out of the way) long enough to cut all unneeded stuff off the frame. Then I'll get the frame on the lift with the body on it. That way we can stretch the frame and mock up the engine, Transmission , and suspension. Once frame is fully welded in I can ship it off to get powder coated. That's the plan at least.

BodyGoes in.jpg


Bracing 1.jpg

Current state.jpg
 
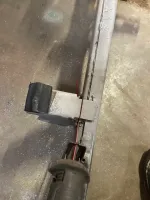
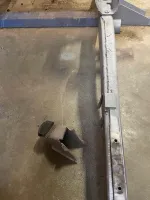
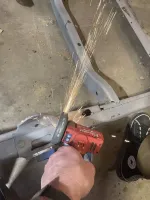
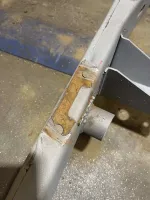
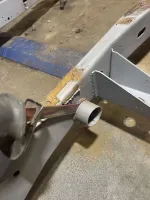
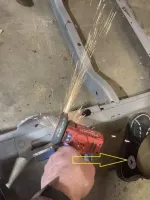
Spent some time tonight cleaning up the frame before I cut it up. Going to cut the back end of frame off just before the spring hanger and use 2x4 steel tube to make a tighter fit to the tup. Means more flex and clearance for the axle/coil overs. I want this thing as low to the ground as I can get it on 40's without rubbing or binding. Low CG means stable on and off road. Especially if your unsprung weight is as low as you can get it compared to your sprung weight. You know, math and stuff. Low profile with massive flex, thats the secret formula for good off-road performance.

012523-Cutting frame 1.jpg
012523-Cutting frame 2.jpg
012523-Cutting frame 3.jpg012523-Cutting frame 4.jpg012523-Cutting frame 5.jpg
 
Nice work. I see you have on the required and correct welding / cutting protection gear :chug: Gotta love Converse!

012523-Cutting frame 3aa.jpg
 
Nice work. I see you have on the required and correct welding / cutting protection gear :chug: Gotta love Converse!

View attachment 77911

Oh yeah! Those are my dress chucks. I forgot to change them and put on my work boots. Those are custom made for me and have my name embroidered on the side. I have so many pair of chucks. It's what I'm know for wearing - even with suits, hence the black dress chucks. lol.
 
  • Thanks for the Post!
Reactions: CJ
Greetings, I have just planted the first seed of my new off road build. The last one was a Toyota 4Runner on tons but now I'm moving back to the Jeep side of the equation. I needed a place to document the build so here I am.

******************** WARNING! ***********************
If you cringe when sheet metal gets cut up, frames get stretched, engines swapped or generally nothing kept stock in a Jeep then be warned this thread is not for you! :p There will be carnage, parts will fly, but in the end it will be beautiful.
********************* END WARNING ********************

The Plan for this build...
My last off-road rig build was a purpose built rock crawler truggy with full custom tube work based on a 2002 Toyota 4Runner. First time I had ever gone that extreme with a build. The only thing I regretted with the build is not making it streetable.
This time I want a super capable off-road rig capable of hitting the hardest most gnarly trails in the US but still have the ability to take to the highway comfortably and safely at 65 MPH, AND it has to be a Jeep CJ.

The Jeep:
I am starting with a 1986 Jeep CJ7 , mostly stock. I got it FREE!!! Free is my favorite kind of vehicle (and also my favorite flavor of beer)!
  • 1986 CJ7 Frame (will be stretched)
  • 1987 YJ Tub (will be stretched and modified)
Drivetrain:
  • Mercedes OM617.A 5 Cyl Turbo Diesel. Built with a UK spec 7.7mm M injection Pump (more more horse powers and torques), converted to serpentine belt and H.O. Alt and Trail Gear PS pump to run full hydro steering (got to steer those 40" tires easily).
  • Muncie SM465 4 speed manual with granny (6.55:1) low 1st gear.
  • DIY NP231 geared underdrive box(s) for triple sticks (I may stack two together meaning the Transfer Case will have more gearing options than the Transmission and a final drive crawl ratio of 1035:1 in first gear.)
  • Dana 400 with aftermarket billet case built for driver drop and low 4:1 gears.
  • Ford Dana 60 Snofighter front axle 3-linked with 5.38 gears and a selectable locker
  • GM 14 Bolt rear axle 4 linked with 5.38 gears and either a lunchbox locker or selectable
Tires/Wheels:
  • 40 x 13.5 R17 Pro Comp MT2s
  • Wheels TBD - But will be forged bead locks.
The rest I'll make up as I go along, in some cases quite literally.

The Story Behind the Build:
A few years ago a guy I knew was cleaning up his shop and had a bunch of good auto parts and some guns and he said I could take them free if I just came and removed them. A year or so later I traded the guns for a beautiful 1967 F250 with a 390 FE Big Block. California truck so no rust anywhere except the pans. Only problem with the truck was it had no title (common in Georgia and Alabama). I held onto that truck for about a year until someone offered to trade me this titled Jeep and all these Jeep parts for it. I said SOLD! I owned a 1980 CJ-7 back in college and was really looking forward to building a new Jeep.

I sold most of the stock parts to help pay for the build. Dana 44 rear axle, Dana 30 front, seats, wheels/tires, etc. A lot of parts will come from my previous build, like the axles, links and heim joints for sure. I was even planning on using the awesome and reliable Toyota 5VZFE 3.4 V6 out of that build too, then I decided to go Diesel instead. I also figured I also might anger Jeep traditionalists with a Toyota engine in a Jeep (but ask me if I really care). :LOL:

The FREE Jeep!
View attachment 77863

Nice dash in good condition.
View attachment 77888

Sadly the tub was too far gone all over.
View attachment 77864

The donor (Previous build)
View attachment 77865
Have no shame sir! Build what you like , the small diesel is a great idea, I should have done it with the 2.8R Cummins
 
  • Thanks for the Post!
Reactions: CJ
Have no shame sir! Build what you like , the small diesel is a great idea, I should have done it with the 2.8R Cummins
100% agree 👍 Build it like you want it. I haven't seen a 100% stock CJ since 1972... :chug:
 
100% agree 👍 Build it like you want it. I haven't seen a 100% stock CJ since 1972... :chug:
I did today a1982 CJ7 hard top out in the snow . Talked the owner a while back nice guy and were that jeep mine zero mods it is that nice.
 
This would be a good time to run a couple of spare wires through the frame for possible use later. You may decide to add some rear mounted LED lights for example. You never know when you might change your mind about an idea. It's easy to pull 'em out if they aren't gonna be used.
 
I decided today that I really want to make this thing a right hand drive. You know like UK/Aussie versions... more appropriately US Postal Service versions.

Why? Well first, because I can and I want to (I mean that's reason enough right?). But second, for those of you familiar with hard core trail riding the spotters in the US who are outside the rig looking at the front wheels always instruct the driver of the rig to turn "driver" or "passenger" rather than right of left. I guess because it makes it easier to understand instructions when in precarious situations? Either way the terms stuck and are used across the US in all events and trail rides. Thus, for seconds, I want to mess with my trail buddies when they said driver and I turn right instead of left. :p I can hear them now. "NO, I said DRIVER!" They don't usually pay attention to who is in the rig, just the outside situation of the rig. I guess that also means my current "driver side drop" axle will be passenger side drop. hmm.

The third reason is because it's just plain cool and I can dub the rig "Gone Postal!" or something to that affect. Though naming it "No I Said Driver" might also be apropos. I can see GONE POSTAL across the hood. Paint it blue in the front with the white half back and red stripe like the old postal Jeeps from the 60s through the early 80s.

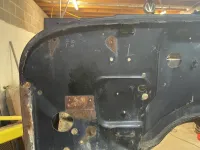
No mater what I call it or how I paint it, it will need some custom fabrication since the 1988 Wrangler tub I have is left hand drive.

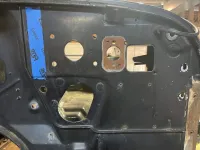
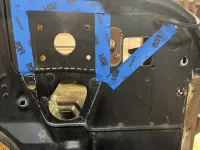
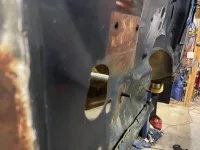
Holes for the steering column and master brake cyl on the left (right in the pic).
RHD-TubFront1.jpg

RHD-TubFront2.jpg

Only need those two parts. Might not even need the steering column hole since I may go with a custom column. Location isn't an issue as long as its lined up to the driver because I'll be using a full hydro steering setup.

RHD-TubFront3.jpg

This side is a bit bent in a very strange way. Not sure how that got bent up, but either way I need to fix it first.
RHD-TubFront4.jpg

RHD-TubFront5.jpg
 
Last edited:
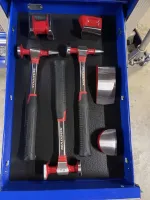
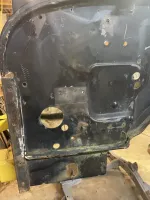
Love me some body work. A little hammer and dolly work gets rid of the nasty crease. Still needs a little finessing to get it perfect. Lots of measuring to do to make sure the brake master cylinder lines up nicely on the right side. I've looked for a RHD firewall replacement but have yet to find one. No matter, I plan to smooth the firewall anyway and get rid of any holes I don't need.

Grabbed the hammer and dolly and got the nasty crease out.
BodyWork1.jpg

BodyWork2.jpg
 
I love your idea but the one big thing I despise is body work! I just hate it!
 
I love your idea but the one big thing I despise is body work! I just hate it!
I feel yah!
For some reason I find it therapeutic. Where it really gets tedious is the final stages of body filer, block sanding, priming, guide coat, more sanding, etc, etc, etc... I guess it depends on how far you really want to go and what level of perfection you really want. Banging out some sheet metal and leaving it that way for a trail only rig is one thing and easy. Going the distance and putting in many hours and hours and hours of prep, sanding, etc. to make something better than stock is an obsession and in some ways crazy I guess.
 
  • Thanks for the Post!
Reactions: CJ
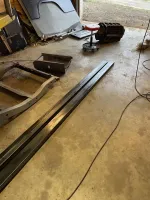
Metals Supermarket guy here in town just delivered what will become my new extended frame rails (back half). I love it when cool people do cool things for customers. He just brought them on over free because my house was on his way home. Now that's service!


New steel delivered.jpg


Delvered.jpg
 
  • Thanks for the Post!
Reactions: CJ
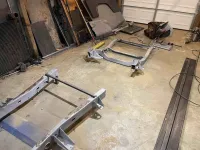
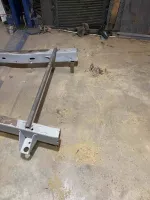
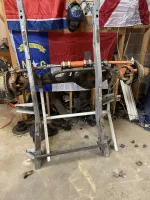
I stripped the front of the frame of all things I will not need. Shock mounts, leaf spring mounts, motor mounts, etc. So pretty much everything but steel. Then measured up the height of the arch, cross braced it and tacked on some temp legs then cut the frame so I can stretch it. But first it must get tipped upright to dump out all the sand from the sand blasting process (so much sand)! Then flipped right side up and put on jack stands to line up with the tub mounts. Then the measuring can begin. Once thats done, flip it back upside down and start building/welding.

Upside down you say? Yes, I said upside down. Why? Because I have it set so the top of the arches equal the perfectly straight and level floor, making it easy to measure and form the back of the frame using the floor as the tub bottom. Work with gravity, not against it. Just a little math and thinking backwards and upside down. Then when its done it should fit right up perfectly. Will need to relocate the rear body mounts and such, but that's no biggy. :cool:

Frame braced and chopped.
chop0.jpg

Close up of the bracing. All temp to keep it square and the correct hieght off the floor.
Chop1.jpg

Light and short enough now to stand up so I can clean up the floor. Leaning against the front axle (1978 Ford Snofighter Dana 60) she will wear soon (after it's cleaned, regeared, and the front steering redone).
chop2.jpg

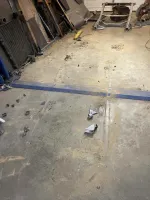
Sooooo much sand in the frame rails. Clean that up plus all the extra frame stuff I cut off.
chop3.jpg

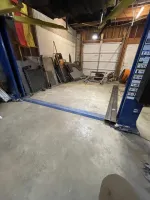
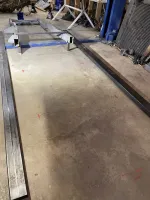
Ahh, now we are talking. Nice clean shop floor to work on finishing up the frame.
chop4.jpg
 
Last edited:
I didn't have a lot of time last night to do much, but I did manage to mock up the new frame and take all the measurements for frame length and width. Marked the shop floor with a paint marker to make sure placement is correct when I flip the front of the frame back over. Flip it over and use the plumb-bob to ensure all is lined up and double check my marks made by eye. Sure enough, all is well. Now, to start measuring and cutting steel to tuck in the rear of the frame.

Align the tub with the front half of frame (front two tub body mounts)...
Mock and measure 1.jpg

Mock up the rear. No need to be perfect here, just close enough will work for now.
Mock and measure 3.jpg

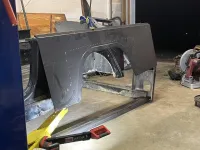
This CJ8 panel will be used for both sides, but half for each side with extra sheet metal I will custom make. Really just bought this one side panel because it was on sale ($149 vs reg $311) so I had something to measure with. Keep in mind this is custom, so I don't care if it exactly matches a CJ8 lengh. Mine will probably be a tad shorter on the bed on the planned longer wheelbase.
Mock and measure 5.jpg

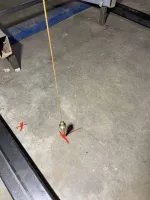
Ah, one of my favorite and simplest tools, the good ol' plumb bob! Useful for many things, like assuring my eyeballed marks on the floor are actually accurate. These will come in handy later when lining up the axles to build the suspension too.
Mock and measure 7.jpg

All measurements checked, re-checked, and marked up good. Body goes up again to make room to build frame.
Mock and measure 8.jpg
 
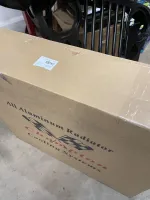
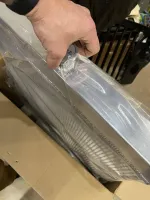
And wouldn't you know it Mr. FedEx actually showed up with the new radiator. Need that and the grill shell to line up the motor in the frame when I get to that point.

All aluminum two row radiator.
New Rad 1.jpg
New Rad 2.jpg
 

Jeep-CJ Donation Drive

Help support Jeep-CJ.com by making a contribution.

Help support Jeep-CJ.com by making a contribution.
Goal
$200.00
Earned
$25.00
This donation drive ends in
Back
Top Bottom