• Hello Guest, we are proud to now have our Wiki online that is completely compiled and written by our members. Feel free to browse our Jeep-CJ Wiki or click on any orange keyword when looking at posts in the forum.
    To dismiss this notice
    click the top right X.

What did you do to or with your CJ today?

What did you do to or with your CJ today?
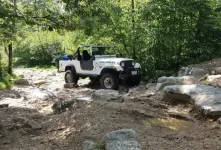
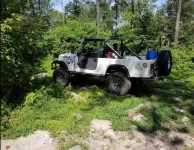
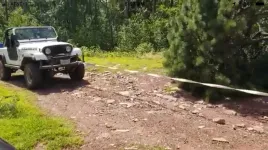
Wheeled the snot out of it in PA. And broke my Transfer Case in the process. I no longer have 4 low. I have a three or so hour drive back to VA tomorrow so I hope 2 high holds out.

Right now, I only have pics of other people. Hopefully someone took pics of me, then I can post them. For now,you will have to take a look at the Scrambler parked at the hotel after then fun day.

c6b824906392167c08c43ac8a0e7b803.jpg
 
Oh my! I hope the Transfer Case problem is something simple and you make it home safe! Sounds like you didn't wheel just greens.

Sent using Tapatalk
 
Oh my! I hope the Transfer Case problem is something simple and you make it home safe! Sounds like you didn't wheel just greens.

Sent using Tapatalk


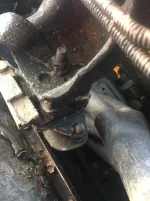
The more I think about it, it may just be a motor mount or Transmission mount based on the violent shaking that was happening. I will take a look at that before I go and tear anything apart. And I was primarily on blues and blacks.
 
Someone posted some pics. They don’t do the hard trails justice. These were taken early on (other than the recovery pics).

2fa54590cd6b847ad2fcab9928007480.png


535a40f5b95428c98d69dc62c15c2ab0.png


68292ad35b404e5049e271654a044bb8.webp

4beb0cda41f18b13ec21648d53917852.png
 
Crawl under the jeep to inspect all mounts before you head home. If their bad the group you went with should help you swap in new mounts if needed.
Last year in Ouray we did both my motor mounts in the hotel parking lot. Just ask permission from the hotel owner first. Sounds like you had a good time minus the breakage.

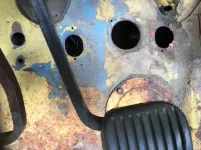
I enlarged the 2 gauge holes by 1/8” with a die grinder. The collier on the gauges is very small which made the job more challenging.

2a715b9118742a3cd0fca6a40c12d626.jpg


I over shot in a couple places and had to fill with wire and refit the gauge. Took longer then I thought. I wish I had 3 1/8” holesaw on hand.

“Holy” Moly!!

Throw floor pedals and a blue bottle cap.

67d61d08d2081b7c16c5d05a511fad85.jpg


00b8d276c8254e734ff183416dbabd16.jpg


654c45a63e1787cab7435994245c895e.jpg


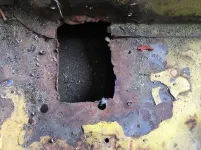
Fuel drain and fuel line holes for under seat tank

006f6caeb47849db33089666adf59241.webp

5550b484a0dc1bc57c843cc041ba9280.jpg


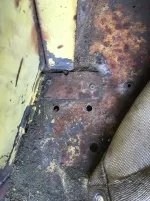
This looks like where the PTO goes but typically the long cut goes front to back not side to side.

f4ddadacf0a522305771b9baf9efed03.jpg


a80574e0f9603bb3e11c04474cf26c87.webp

3c7fb0af1b05910e60d9a1e006d6592a.webp

91d4bf19984fe469102f0867dadf6cab.jpg


16 days left.


Sent from my iPhone using Tapatalk
 
Last edited:
Missed one, fuel drain

becbf14e2e622af727b74732da64faad.jpg


Nice wheeling pics, start a thread in the trail report section for a full report.

The trails/hills never look as challenging in pics and videos as in real life.


Sent from my iPhone using Tapatalk
 
Last edited:
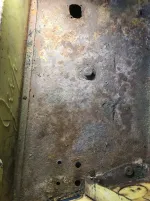
Just filling holes......

A slight challenge with the pedals and steering wheel in the way.
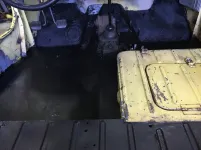
I’ll add some Por Patch to seal up the low spots.

fe267b6949246de8697150096d525a37.webp

444372811468ef68094504f777956a39.jpg


59aac8ecc384c9cb8f83e8ea9aeb688d.jpg


2f0599f4d60f6c1e76b59a5607070aaf.jpg


a876d41d9f3bf807166e8b5f40ab92aa.jpg


a78b54a2dd9f9bcb83c733f514769978.jpg


974544c5e177bf4da07b4eda07cc0e3a.jpg


c94a7ceb7d52db6eb346dc5b9b448828.jpg


Sent from my iPhone using Tapatalk
 
Lapped in some 16g bracing.

b895059183d6393890ca9a45121ffdc0.jpg


Finished the driver side.

Passenger side isn’t bad just 4 holes to fill

85c4e2960890072d6a421cca3ccb0930.webp


Sent from my iPhone using Tapatalk
 
Filled the holes in the passenger side floor.

0c342380fe7309253a04d8477a802758.jpg


I finished hole filling on the inside of the tub. Still have 30-35 holes to fill on the outside from the door opening to the grill.

Scraped down the inside of the tub, primed the new metal, and washed out the tub.

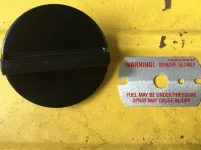
Nothing against Mexico, but there will be no metal tag on my new cap.

950905f457c95704c2b5f79d41611992.webp

I added some fuel and fired the engine. If you recall from my earlier post I had 9 PSI on the fuel return line from a kinked hose I found at the top of the tank. GM factory specs call for 0-4 PSI.

https://youtu.be/inkeQ2IP_r8

I still have to check PSI at the feed line.


Sent from my iPhone using Tapatalk
 
Last edited:
Finished all but a few holes on the outside. I’ll get to those few tonight.

Reattached the heater.

Laid down por patch on all the floor seams and newly filled holes.

A couple coats of rust encapsulator on the floors.

ce5857b133dfdd7870dbe28a82776279.jpg


c473b9a028c02e865a4d13c41a225df0.webp


Sent from my iPhone using Tapatalk
 
Removed the body hardware which consist of snaps, brackets, and hinges.

Installed new fuel line in the engine compartment.

When I previously tested feed fuel pressure I found 10 PSI, when I twisted the throttle shaft it dropped to 9 PSI. After installing new vent grommets, fuel line, fuel pump sock, and cleaned all the RTV from the system I now have a spot on steady 12 PSI.

https://youtu.be/AMyjKXRBsUU


Sent from my iPhone using Tapatalk
 
Last edited:
Finished all but a few holes on the outside. I’ll get to those few tonight.

Reattached the heater.

Laid down por patch on all the floor seams and newly filled holes.

A couple coats of rust encapsulator on the floors.

ce5857b133dfdd7870dbe28a82776279.jpg


c473b9a028c02e865a4d13c41a225df0.webp


Sent from my iPhone using Tapatalk

Does this coating, help to cut down on 'road-noise' much at all?
LG
 
Does this coating, help to cut down on 'road-noise' much at all?
LG
I would say it doesn't do much if anything to cut down road noise. A layer of insulation, rug, and a top would do the trick. The Super Swamper TSL's are fairly loud running down the road, I'm sure I wouldn't be able to hear the radio at 40mph.

I mainly added the por patch and rust encapsolator to keep out the weather and rust protection. I'll sand it down and add a top coat. Thanks for the question.

Speaking of tops, I found a new, never installed top, doors, and bows for my 3b at 25% of it's original cost. I'll be picking it up the day I land in Denver.
 
Last night I began adding a skim coat of plastic where needed on the exterior of the body.
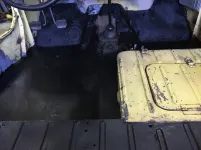
Installed the rollcage inplace to mark the rollcage footpad. I’ll need to cut the pad to match the driver’s side wheel well notch.
 
Installed dual electric fans. See build thread for details.


Sent from my iPhone using Tapatalk
 
^^^ Nice!

Finished welding on the body.
Finished 90% of the plastic skim coat.


Sent from my iPhone using Tapatalk
 
Today I successfully updated the Holley Sniper firmware for the handheld unit and the ECU. Then we took it for a drive. This latest version is supposed to learn and control better. The jeep ran great!

Sent using Tapatalk
 
The lighting in my shop could be better. Turns out I found more holes to weld along with a crack in the driver’s side fender
Continued with the plastic skim coat and sand.
Block sand the interior and exterior.
Moved the jeep out to vacuum and blow off the dust.
Removed the lights from the grill
Just after midnight I cleaned up the shop.
I also helped install a 2” lift in a 2012 JK. Coil springs, shocks, bump stops, and extended brake line brackets for the rear.


Sent from my iPhone using Tapatalk
 

Jeep-CJ Donation Drive

Help support Jeep-CJ.com by making a contribution.

Help support Jeep-CJ.com by making a contribution.
Goal
$200.00
Earned
$100.00
This donation drive ends in
0 hours, 0 minutes, 0 seconds
  50.0%
Back
Top Bottom