What did you do to or with your CJ today?

What did you do to or with your CJ today?
Real good for a 64 year old. I'm not that old yet and I've had a few pieces of skin removed myself.
 
Only thing left before reassembly is cleaning out all the head bolt holes......

f91a1c5c47b79993993c75041a3bce18.jpg


Sent from my iPhone using Tapatalk
 
Any of the bolts that go into a water jacket put a sealer on the threads.
 
Only thing left before reassembly is cleaning out all the head bolt holes......

The rotor looks tall is it for a later wide distributor cap?

Real good for a 64 year old. I'm not that old yet and I've had a few pieces of skin removed myself.

Haha,

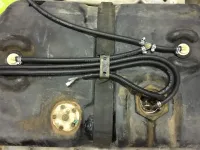
New hoses, o-ring, and grommets. I also added bicycle tubing on the strap to protect the plastic tank. Ready for install.

c1997926609444d9a167da39a60156bf.jpg

I now see the reason for the heavy electrical tape and pipe insulation.

1f796e47b4778d0a0a83ac89bc9b5b96.jpg


fa06532ab6ddc8604a656198aad066eb.jpg


It made for easy roll cage removal.

Typically a sleeve would go inside to give a seamless look. However, with time restraints I’ll tack it in place before removing, lose the bolts, then weld it solid.


Sent from my iPhone using Tapatalk
 
Last edited:
I took advantage of the tank being out to paint places I otherwise couldn’t reach. I used Rust Encapsulator.

fbeda3ff1d9c1ed56c6179cf35eb52c0.jpg


85246884b87cf6e4c764deebb7ed0562.jpg


ba1ffb806cf522f6a78766a8ac44c55d.jpg


The 20 gallon rear tank will be plenty of fuel storage for my needs even with a 401.

8cf1b64f24ebf4981d769b9b26ba2d2d.jpg


90f1f862183fd2526ed611480b7bbf4d.jpg


24ab72a5cd42f29376a3cc70899ee86a.jpg


Sent from my iPhone using Tapatalk
 
Thought so with the tall rotor.
 
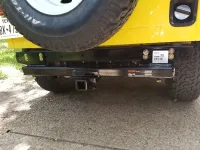
I installed my hitch today, it looks good and for the most part it went OK. There were some issues that I thought should have been been a issue.

The 8 bolts on the rear use washers that the OD is to big. It causes the washers to overlap, so I made sure the bottom ones are flat and let the upper ones overlap so they dont trap water behind the lower washers.

The pinch bolt on the bottom right side has welded nuts and one of the welds failed before I got to full torque.

The part that runs down the right side of the frame rail was hanging up on the top of the rear shackle so I had to grind a notch in it.

There are 4 nut plates that the weld up and powder coat, I had to chase the thread on all of them as they were full of paint.

20180719_131255-L.jpg

20180719_131318-L.jpg

20180719_131356-L.jpg
[/url][/IMG]
 
aea1e603a47cf352d28d695d0d578e69.jpg


78c503a5e7c7991a2f649c67c80096c8.jpg


Side mirror mount

5423546a9d5f7a73a0c8e0c166eeaccc.jpg


1bb2d5545c00025f67c8cbb450830c44.jpg


a141a91e1ff43df3b1d3a4b30ece329a.jpg


I strapped the rollcage legs before removing it because they typically spring outwards, this one sprung inward 1 3/4”

e204a1b7d6564e479e58ffda0cd717a9.jpg


476455916f4a33cde2dac6a3d5bb51e4.jpg


The big question, how bad does it look behind the cherry dash?

07a4b8323e04077bb77ae437d9203823.jpg


Sent from my iPhone using Tapatalk
 
Last edited:
As wood dashes go the P.O. did a good job with it. However, I plan to go with a metal dash.

.
fbc9ff566b8a18e69539d431c503da59.jpg


ad9cb9df6abf21fc764fddfd13b7141e.jpg


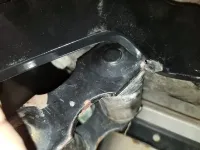
I bumped my head way too many times on sharpe objects while removing the dash.
I’ll be in Colorado Springs on the 15th, that gives me less then 4 weeks.

Moving forward!


Sent from my iPhone using Tapatalk
 
Last edited:
Nice progress!! At first I thought it a shame to discard a cherry dash, but looking at the photo I believe it’s pine stained to look cherryish...... discard away


Sent from my iPhone using Tapatalk
 
Thanks,

Yes, it’s pine stained to look cherry. The PO mentioned to me a number of times about the cherry dash he hand made. I felt a little guilty removing it.
 
.......I felt a little guilty removing it.


Nah - We all do stuff unique to our tastes and it would be a bit presumptuous to assume everyone would have the same tastes....... it’s yours now so don’t let it bother you too bad


Sent from my iPhone using Tapatalk
 
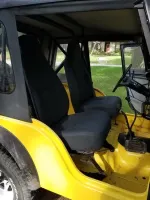
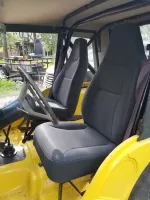
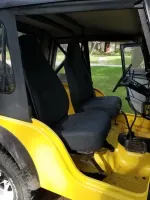
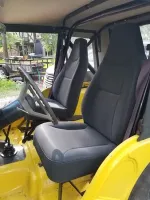
I put in my new seats today, cleaning the old seat tracks took the most time but I got them working good now.

The old ones were in bad shape, some of the springs on the bottom of the seats had rusted in two, someone had already broken off one bolt and replaced it with a smaller size and a nut.

20180720_181602-M.jpg

20180720_181618-M.jpg
 
They look great!!


Sent from my iPhone using Tapatalk
 
Well done on the seats.

Legroom was on the ticket last night.

833fae018ec66601712d2e89bd2c10a5.jpg


3499a68c24c8c19bab719400f45819a4.jpg


9ca55fe5d017a7c38347c71ce329fc9b.jpg


A bit more flapper wheel work to do.

Removed the gauges and taped off the wires going to them. Lots of cleanup to do there.

a8eecdd6a5a8bf862c17a4bfcf86c059.jpg


Sent from my iPhone using Tapatalk
 
I put in my new seats today, cleaning the old seat tracks took the most time but I got them working good now.


The old ones were in bad shape, some of the springs on the bottom of the seats had rusted in two, someone had already broken off one bolt and replaced it with a smaller size and a nut.


20180720_181602-M.jpg


20180720_181618-M.jpg


Those seats look great!

I took the 3a out for a little drive last night. And boy do I need to do something about the driver seat. The cushion is gone. I feel the metal springs in my butt and my back. I see a reupholstering job in the future. I definitely want to keep it stock.
 
Found an exposed wire on the fuel pump feed so I upgraded the wires to the fuel pump, sending unit, and taillights.

148c8f30ae83f08d74c3e92a95001ba6.jpg


Installed the fuel tank and skid plate.

1b8f07b3d3e635f565d75c7606bc083f.jpg


I removed 2 inline fuel filters that were not design to be run with this fuel system. I added the correct one.

82a112baa5892b32eadb1912d9a7b18b.jpg


Sent from my iPhone using Tapatalk
 
Went from a 2.5” leaf lift to a 4” leaf lift. Also put in YJ shackles adding .5”. Needed it done before I go wheeling in PA next weekend.

Old before pic
0f4d31569958460e8db94b98de0b2d18.jpg


Rear done
05837838b4f58bbb629af7373e12a168.jpg


All done
2da029724f03f2e7765362cf2cb81490.jpg
 

Jeep-CJ Donation Drive

Help support Jeep-CJ.com by making a contribution.

Help support Jeep-CJ.com by making a contribution.
Goal
$200.00
Earned
$0.00
This donation drive ends in
Back
Top Bottom