What did you do to or with your CJ today?

What did you do to or with your CJ today?
Today was fixing the headlight adjustment thingy and running the heater core lines to the intake manifold water jackets.

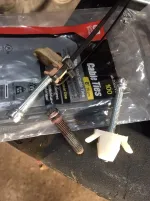
For those who did not see my thread on the headlight adjustment screws, mitchelllogic helped me out and found a replacement plastic screw made by MTS and sold at Morris4x4center.com. I ordered the kit yesterday (that's when I stripped the threads while adjusting it) and fixed it today by putting a couple small zip ties through the hole and letting those take up the space for the threads. I'll keep the MTS parts kit in the glove box.

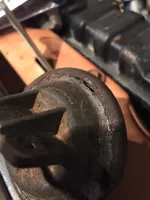
I also bought a couple of the generic replacement fittings but of course they did not fit, but I did use the screw from those kits and it fits together perfectly. If you happen to take the plastic thingy off like I did by drilling out the rivet, it can be re-attached with a 4mm screw and nut.

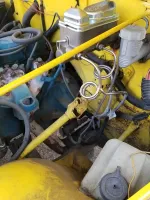
Hooking up the water jackets on the intake manifold was just a matter of cutting the heater hoses and connecting them to the manifold. I got a little fancy by putting in an elbow at the thermostat end and a filler fitting at the back line from the manifold to the heater core. Had to install three pipe fittings to plug up the holes for sensors that my CJ does not use (83 manifold on 79 CJ).

All in all, very productive day. ....and I thought I heard the water pump bearing going out so I ordered a new one, just to have on-hand.

0dfdd9ca898ca0631f90187811c61aa1.jpg
 
Last edited:
Replaced the turn signal switch, works like a charm now.

Next thing to do is fix those headlight adjuster screws. I also rigged them up due to being brittle and old. Thanks for the info, JeeperChris.

Almost forgot to ask you, does one kit do both headlamps? There are two adjusting screws per headlamp, as we know.
 
I noticed that you managed to hit that stake with both the front & rear tires... then noticed that you appear to be missing?!


LMAO someone had to get the footage


Sent from my iPhone using Tapatalk
 
I missed the snake -


Sent from my iPhone using Tapatalk
 
Then worked on the pilot bushing with a slide hammer for a good 1/2hour.


This may sound really dumb, but I've used it multiple times now on multiple pilot bushing removals...

Take regular sliced bread. Remove crust. Stuff said bread into the pilot bushing hole - really pack it in there. Find a socket the right size to fit pretty smugly in the pilot bushing hole and tap with hammer on the bread.

Same idea as the old grease pack pressure trick, but much easier to clean up. Only out part of a sandwich. Swear it works so much easier I don't even attempt slide hammer anymore.

:chug:
 
Replaced the turn signal switch, works like a charm now.

Next thing to do is fix those headlight adjuster screws. I also rigged them up due to being brittle and old. Thanks for the info, JeeperChris.

Almost forgot to ask you, does one kit do both headlamps? There are two adjusting screws per headlamp, as we know.

The kit comes with two plastic nuts as it's typically just the top adjusters that go bad. Who really adjusts the side to side movement??

Here's the link:https://www.morris4x4center.com/mts-headlight-adjuster-kit.html

You have to drill out the rivet holding the old one in which is the center rivet of the three you will see when you remove the headlight.
 
Then worked on the pilot bushing with a slide hammer for a good 1/2hour.
Dug through my junk bucket and found a 3/4” wrapped some electrical tape filled the crank bore with grease and it popped out with a few wacks.


This may sound really dumb, but I've used it multiple times now on multiple pilot bushing removals...

Take regular sliced bread. Remove crust. Stuff said bread into the pilot bushing hole - really pack it in there. Find a socket the right size to fit pretty smugly in the pilot bushing hole and tap with hammer on the bread.

Same idea as the old grease pack pressure trick, but much easier to clean up. Only out part of a sandwich. Swear it works so much easier I don't even attempt slide hammer anymore.

:chug:
My method is to use a 3/4" tap. While I'm turning the tap it's pulling out the bushing. I can have it out in 30-45 seconds, and no mess to clean up. You could easily use a course screw as well.


Rent or buy the tool is an option as well. Although not as fast as using a tap.

https://www.autozone.com/loan-a-too...ch-pilot-bearing-puller-attachment/230517_0_0
 
Got the T-4 back together this afternoon with new input shaft bearing. Still has some lateral play in the shaft but no endplay- might need it to get everything back together.
Tomorrow the Dana 300 goes back together and I have every helicoil kit except a 3/8-16 to fix the bellhousing starter bolt hole.


Sent from my iPhone using Tapatalk
 
Made mine almost undriveable yesterday...

I have been noticing lately the throttle hasn’t been backing off at idle without blipping the gas - in checking the throttle return spring, it had relaxed a good bit, so I shortened the ends a bit and rebent the hooks. That was after work and I didn’t drive it this morning to go to work. Not only does the throttle back off now, but my right leg is gonna be bigger than my lady shortly. It COMPLETELY changed the whole gas / clutch dynamic to the point I almost couldn’t drive it LOL. I laughed all the way to work..... I’ll be hittin up the hardware store this weekend for sure


Sent from my iPhone using Tapatalk
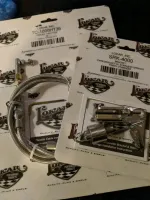
Lokar universal throttle cable and bracket! I swear you will want to kiss me once that's done (beard and all!).74e731d10da40573d11319e6c56348dd.jpg

Sent from my Pixel 2 using Tapatalk
 
Mmmmmmm, beards

LMAO

I’ll hafta look into that. The only thing wonky right now is the stupid return spring, but much more of this and I’ll be walking in circles . That’ll give me something to do tonorrow


Sent from my iPhone using Tapatalk
 
Mmmmmmm, beards

LMAO

I’ll hafta look into that. The only thing wonky right now is the stupid return spring, but much more of this and I’ll be walking in circles . That’ll give me something to do tonorrow


Sent from my iPhone using Tapatalk
Good luck with it.
I had similar issues. Eventually it lead to riding the brake until the throttle finally released. Not fun or safe. Also was not very responsive on the get up and go.
Replaced my springs with two different springs trying to improve the situation.
Then I got sick of it and replaces the whole setup with a hot rod kit and WOW what a difference. Woke it right up. Responsive!
If you do let a new cable I found the 36" fits best.24" is too short.


Sent from my Pixel 2 using Tapatalk
 
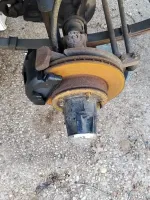
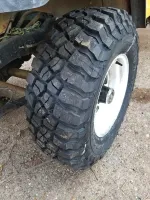
This weekend I installed a new master cylinder, calipers, pads and KM3 rubber on the front.

20191215_135335-L.jpg

20191215_132639-L.jpg

20191215_135024-L.jpg
 
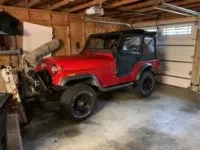
After owning my CJ5 for 7 years, I finally have a garage to protect her from the weather.
 

Attachments

  • IMG_1696.jpg
    IMG_1696.jpg
    40.1 KB · Views: 27
Well, I'm off until the 6th of January sooo I managed to get the right rear brakes put back together after putting the axles back in, I bolted up the retainer flanges on the both sides so now I can put the diff. cover back on. I put the tires and wheels back on too so I can roll it around. Didn't fix anything but I know what I need to replace now. Everything. Until I've the cash to fix it all, I'll just drive it around town and work the rest of the bugs out of her.
I started laying out the clearance cut on the driver's side so my adjustable seat mounts will work but I'm a bit hesitant to make the cuts yet until I quadruple check the lay out. Lol!
I welded some straps in on the driver's side seat bracket for the adjustable seat mounts I bought but I'm gonna have trouble mounting the seats now. I put the straps under the seat bracket and where I need the holes for the sliders is right on the welds on one side. Which reminds me of an old saying, measure twice, weld once. : ( I think I'm gonna have to cut them back out and put them on top or I'll just bolt them in with some counter-sunk bolts.
Started to reassemble all the fuel tank stuff, hoses, sending unit and plan on putting some speed nuts in the holes on the rear corners and center tab on the front of the tank so it won't be so hard to pull it next time. And I'm sure there'll be a next time.
Tomorrow, I'll pull the manifolds off the engine 'cuz I broke an exhaust stud off when I pulled the exhaust. Then I'll weld up the cracks in the exhaust manifold. Don't worry, I know how to do that. I think. :O
Once I get the manifolds back on, the tank back in and a battery in it, I'll fire it up to make sure I've got the fuel system working properly then I can start putting the body parts back on.
I've got a new windshield too so I'll clean up the frame and put that in as well.
Wish me luck!
 
I got to walk to the nearest advance auto parts twice last night bought a punch set full metric/SAE wrench set, brake fluid, and believe it or not the correct 1992 clutch master cylinder which was in stock.... what’s the odds of that???

It took me three hours to get home from work last night but I made it....... hopefully my wife doesn’t divorce me lol


Sent from my iPhone using Tapatalk


Sorry to gear about your long commute. And that is shocking that they had the master cylinder in stock.
 
Finally got the throttle canble on the Jeep! I took the suggestion from mitchelllogic and used the Lokar kit. I'm a believer, it got rid of all that linkage :dung: and everything fit beautifully. The return spring i had to get a little creative with but worked out fine. The final adjustment was getting the idle to go back down properly and that's where the adjustment in the cable itself came into play, and it it worked. I'm a happy camper.
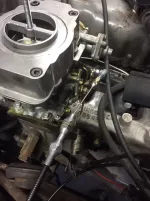
If anyone else is going to do this i'll throw in some more pictures of the return spring.

f23567b7f3ea259beebeef1361cc85ed.jpg


Sent from my iPhone using Tapatalk
 
Did a compression test for sanity sake before I dive into new lower end bearings- hot idle pressure is 12-15psi and I know the bearings are scored from when I replaced the rear main. Cylinders all came in 145-150psi. Pan to rebuild the oil pump while I’m in it and change the engine mounts.

Removed the ignition ballast wire and corrected a couple duct tape splices buried in the mud packed loom. Then I thought I’d fix my leaky vacuum advance canister- turns out someone has tried it before as evidenced by the jb weld on the area they broke.
e3113593a5edcf4c357494f8d188c95a.jpg


Sent from my iPhone using Tapatalk
 

Jeep-CJ Donation Drive

Help support Jeep-CJ.com by making a donation.

Help support Jeep-CJ.com by making a donation.
Goal
$200.00
Earned
$25.00
This donation drive ends in
Back
Top Bottom