• Hello Guest, we are proud to now have our Wiki online that is completely compiled and written by our members. Feel free to browse our Jeep-CJ Wiki or click on any orange keyword when looking at posts in the forum.
    To dismiss this notice
    click the top right X.

Build Thread 3rd time down the rabbit hole...

Build Thread 3rd time down the rabbit hole...
Added some LEDs to the back rack, took the time to hide the wires inside the square tubing. I still need to do a little tidying up on the wires, but I'll get to it in the next week or two. I mounted high enough not be shining in my eyes at night, but still can be angled more downward if needed.
 

Attachments

  • rear leds2.jpg
    rear leds2.jpg
    84.8 KB · Views: 71
  • rear leds1.jpg
    rear leds1.jpg
    86.5 KB · Views: 69
  • rear leds5.jpg
    rear leds5.jpg
    89.5 KB · Views: 80
  • rear leds6.jpg
    rear leds6.jpg
    88.6 KB · Views: 62
  • rear leds3.jpg
    rear leds3.jpg
    87.4 KB · Views: 24
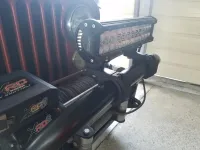
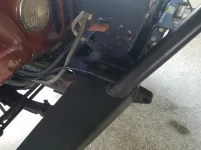
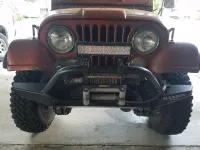
While I was at it, I added a 12" LED bar to the front. Hid the wire inside the bumper tube. I put my tube clamps on in such a manner that the LED bar is slightly behind the stinger itself. If needed I can push into some brush or sunflowers in my case without the light in the way. I still need to go to the hardware store and get a R clamp to secure the wire to the bumper where I brought it out the tube. May go back to the lake tonight for a trial run. If it was cooler I'd rifle up and be lookin' for some squealers.
 

Attachments

  • front led bar1.jpg
    front led bar1.jpg
    89.7 KB · Views: 53
  • front led bar2.jpg
    front led bar2.jpg
    90.6 KB · Views: 36
  • front led bar3.jpg
    front led bar3.jpg
    95.7 KB · Views: 30
Hid my lug wrench (1/2" breakover bar and socket) inside the square tubing of the back rack. Used a piece of split water hose to stop the "tinging" when the breakover bar was banging around inside the tubing.
 

Attachments

  • Lug wrench1.jpg
    Lug wrench1.jpg
    85.9 KB · Views: 59
  • Lug wrench2.jpg
    Lug wrench2.jpg
    82 KB · Views: 34
Looks good, you've been a busy boy lol.
By squealers are you referring to coyotes? I hate the basty nasterds!! I live in the country and do love me some deer and turkey hunting. I'll give a pass to my Red Foxes and Bobcats even though they are known nest robbers but I NEVER give a pass to a Yote.
 
Looks good, you've been a busy boy lol.
By squealers are you referring to coyotes? I hate the basty nasterds!! I live in the country and do love me some deer and turkey hunting. I'll give a pass to my Red Foxes and Bobcats even though they are known nest robbers but I NEVER give a pass to a Yote.

We refer to wild pigs as squealers because of the how they scattered when one gets taken out. Did see one yote' yesterday while I was there. He is now on borrowed time, from here on out I'll be packin' when I go there.
 
Added some LEDs to the back rack, took the time to hide the wires inside the square tubing. I still need to do a little tidying up on the wires, but I'll get to it in the next week or two. I mounted high enough not be shining in my eyes at night, but still can be angled more downward if needed.

May I make a recommendation, with 18 yrs of car audio experience. Get some plastic grommets or some sort of strip caulk to insulate where those wires enter the tubing. Seen lots of wires in much smoother riding vehicles ground out due to chafing, even with heavy insulation. If nothing more some plastic split loom will give you good protection as well.
 
Masscj7, I thought you'd sleep better knowing I finished hiding the wires and did put in some chafe/rub protection. I split some tygon tubing to encase the wire then put that into the holes to protect the wires.
 
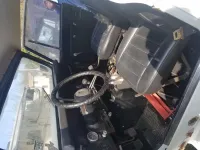
winch operation from drivers seat completed. it wasn't as bad as I envisoned and as a bonus there was plenty of room under the control cover box. Crimped on a couple of ring lug terminals and was in business. Master arm switch makes the rocker "hot" then I got winch in and out from the seat.
 

Attachments

  • remote wire1.jpg
    remote wire1.jpg
    91.8 KB · Views: 36
  • remote wire5.jpg
    remote wire5.jpg
    96.4 KB · Views: 53
  • remote wire4.jpg
    remote wire4.jpg
    97.2 KB · Views: 26
  • remote wire2.jpg
    remote wire2.jpg
    95.4 KB · Views: 26
winch operation from drivers seat completed. it wasn't as bad as I envisoned and as a bonus there was plenty of room under the control cover box. Crimped on a couple of ring lug terminals and was in business. Master arm switch makes the rocker "hot" then I got winch in and out from the seat.

the 12volt guy used to sell a switch and cover set for winch control that was engraved " Plan B" lol I still want to get one and install on mine
 
Masscj7, I thought you'd sleep better knowing I finished hiding the wires and did put in some chafe/rub protection. I split some tygon tubing to encase the wire then put that into the holes to protect the wires.

Haha, I have plenty of things on my build to keep me up at night, but excellent wire protection! And you addressed one of the most common mistakes, wire protection to the firewall or to where ever the wire is entering, but no grommets, 3M strip caulk or running the wire loom through the penetration to protect through the metal penetration. I'm an amateur, shade tree mechanic, but 12 volt accessories and audio is my jam, lots of years of shoved up under dashes as well as my own business.

Nice work and progression.
 
Well furk, I was gonna put up some picts, but they all wanna load sideways. Ya'll will have to wait until tmrw now.
 
Spent part of Sunday adding some creature comforts to 'ol trusty rusty. Installed the quick release fire extinguisher bracket. Put a knife within easy reach and also a tape measure. Seems like everywhere I go I end needing a tape measure for something. I keep on in all my vehicles.
 

Attachments

  • Console2.jpg
    Console2.jpg
    88.2 KB · Views: 44
  • Console1.jpg
    Console1.jpg
    91.3 KB · Views: 33
  • FE1.jpg
    FE1.jpg
    86.4 KB · Views: 57
  • FE2.jpg
    FE2.jpg
    86 KB · Views: 25
So I also added some picatinny rails for a flashlight and phone. I still have a couple of spares for future expansion. Then added a detail piece to the shift knob. I still need to come up with something for the passenger grab rail yet.
 

Attachments

  • Pica2.jpg
    Pica2.jpg
    96.7 KB · Views: 37
  • Pica1.jpg
    Pica1.jpg
    97.4 KB · Views: 34
  • Pica3.jpg
    Pica3.jpg
    96.9 KB · Views: 55
  • TxSeal.jpg
    TxSeal.jpg
    88.1 KB · Views: 38
Last edited:
I love the shifter medallion

Have you thought about doing the grab handle like the factory did with the Laredo ’s?

I’m thinking about whatever I cover my seats in I will do my shifter boots and grab handle with
 
worked on some door mods today. Built some extensions on the latches for easier opening.
 

Attachments

  • door mod2.jpg
    door mod2.jpg
    93.7 KB · Views: 48
  • door mod4.jpg
    door mod4.jpg
    100.7 KB · Views: 49
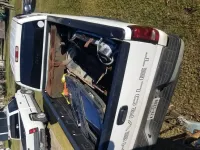
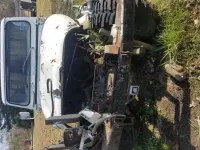
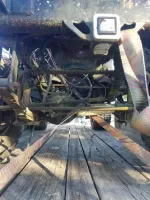
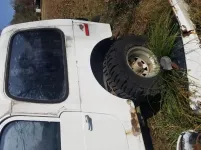
Look what followed my home....now what?
 

Attachments

  • wcj6.jpg
    wcj6.jpg
    96.4 KB · Views: 46
  • wcj7.jpg
    wcj7.jpg
    96.6 KB · Views: 32
  • wcj8.jpg
    wcj8.jpg
    95.8 KB · Views: 37
  • wcj5.jpg
    wcj5.jpg
    95.4 KB · Views: 44
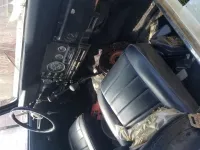
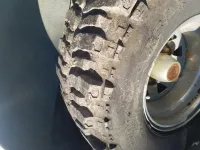
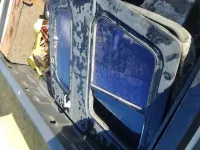
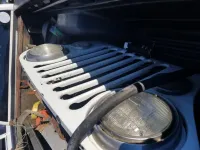
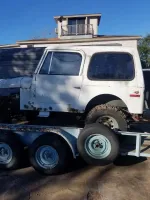
The previous long block pictures were part of deal I made. Here are the picts of all I got. Here's a partial list of what I got; right now I haven't even dug into everything yet. A titled 1980 CJ7 air conditioned with a AMC 304 4spd, not sure of the Transfer Case (it was too muddy to crawl under), Warn winch, new 20 gallon poly tank, new aluminum skid plate, all 3 seats look to be pretty decent shape, tow bar, sitting on good rubber 33's, hard top is legit-no cracks in the fiberglass or glass, original lift supports need replaced, MSD ignition (not in box, but it looks new) new bikini top, another set of doors, and the long block from previous post.
 

Attachments

  • wj1.jpg
    wj1.jpg
    95.1 KB · Views: 41
  • wcj2.jpg
    wcj2.jpg
    97.9 KB · Views: 33
  • wcj3.jpg
    wcj3.jpg
    93.3 KB · Views: 37
  • wcj4.jpg
    wcj4.jpg
    94.2 KB · Views: 41
  • wj6.jpg
    wj6.jpg
    97.4 KB · Views: 47
Last edited:
Continued...
Most likely, I'll strip it down and sell off the parts. I have some other stuff left over from my current CJ to sale also. We looking at buying some land out West and I need to purge. My next place will have a shop with a lift.

One day I'll remember to turn my phone for pictures I intend to post. Sorry guys.
 

Attachments

  • wj9.jpg
    wj9.jpg
    97.7 KB · Views: 38
  • wj8.jpg
    wj8.jpg
    90.6 KB · Views: 34
  • wj7.jpg
    wj7.jpg
    99.2 KB · Views: 49
  • wcj.jpg
    wcj.jpg
    98.7 KB · Views: 42
  • wj3.jpg
    wj3.jpg
    98.5 KB · Views: 36
Dang your gonna have a collection of Jeeps in a minute


Sent from my iPhone using Tapatalk
 
Stripped her down just like I would Sandra Bullock. Fire sale coming soon on Houston craigslist.
 

Attachments

  • wj junk.jpg
    wj junk.jpg
    96.7 KB · Views: 34

Jeep-CJ Donation Drive

Help support Jeep-CJ.com by making a contribution.

Help support Jeep-CJ.com by making a contribution.
Goal
$200.00
Earned
$25.00
This donation drive ends in
Back
Top Bottom