• Hello Guest, we are proud to now have our Wiki online that is completely compiled and written by our members. Feel free to browse our Jeep-CJ Wiki or click on any orange keyword when looking at posts in the forum.
    To dismiss this notice
    click the top right X.

Build Thread Jr's 74 CJ5 "fix" and build as I go...

Build Thread Jr's 74 CJ5 "fix" and build as I go...
I see what you guys are saying. I'll take some measurements in the garage tonight. I'll take some good pictures of everything too to show what the kit all came with.

The new spring plates have like a double bottom plate to recess the bolts and nuts into the plate. (there's gap between the two plates) hard to describe, but it looks pretty trick. I'll check out the measurements of the shocks, and then the measurements I should need with the "kit mounting" positions and measurements I should need if i do the top of axle mount like you guys are saying too. See if the shocks work for either of them, and go from there.

I'll post some pictures of it all tonight / tomorrow.

First things first, does anyone have good link to detailed Dana 20 rebuild? I have a good idea, but like to look over a few before doing it.

I've searched around a bit, but haven't found one besides pirate where hes doing a bunch of different stuff...

:chug:
~ Jr
 
I see what you guys are saying. I'll take some measurements in the garage tonight. I'll take some good pictures of everything too to show what the kit all came with.

The new spring plates have like a double bottom plate to recess the bolts and nuts into the plate. (there's gap between the two plates) hard to describe, but it looks pretty trick. I'll check out the measurements of the shocks, and then the measurements I should need with the "kit mounting" positions and measurements I should need if i do the top of axle mount like you guys are saying too. See if the shocks work for either of them, and go from there.

I'll post some pictures of it all tonight / tomorrow.

First things first, does anyone have good link to detailed Dana 20 rebuild? I have a good idea, but like to look over a few before doing it.

I've searched around a bit, but haven't found one besides pirate where hes doing a bunch of different stuff...

:chug:
~ Jr

:)Dana 20 Transfer Case ..........where did you get the rebuild kit from? Novak has instructions online in fact you should buy one of there HD 1.250" cross shafts for the rebuild if you don't already have one. I've got some good reference material around here somewhere send me a PM with your e-mail and I'll find it and scan it for you. You also need some special assembly lube, the type I get I put it in the freezer overnight so it is firm and holds the needle bearings during assembly.

:D:D:D:D
 
Nice!

I did get the kit as well as instructions from Novak.

I'll pm you my email now.

Cheers
~ Jr
 
Nice!

I did get the kit as well as instructions from Novak.

I'll pm you my email now.

Cheers
~ Jr

:)I found some of it I'll get it scanned here tonight or in the AM and send it to you.

:D:D:D:D
 
if i do the top of axle mount like you guys are saying
~ Jr
Jr. just to be sure we are talking the same, the mount goes on the back side of the axle, high enough to get the shock above the bottom of the axle.
I went out and took a pic.
 
Got the Dana 20 tore apart, cleaned up and reassembled with all the new bearings and seals. With any luck it will work just fine, and not leak! :cool:

I always get started and get all dirty handed and then am unable to take pictures during the process. I'm going to work on that...

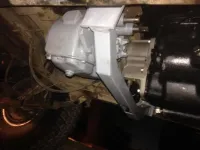
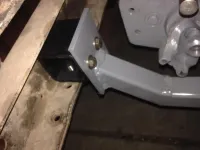
Here's some pictures of the Dana 20 towards the end (well at the end) of the re-build:

attachment.php


attachment.php


attachment.php


Have a couple questions on the rear output shaft in relation to the spedo gear that i'll post in the drivetrain section.


Remember how I said my clutch was smoked?

attachment.php


attachment.php


:D:D

Thats all for now. Was trying to get the flywheel off to be re-surfaced, but the blots were too tight and the harmonic balancer bolt loosened instead of holding the motor... So got to get tricky with that this week.

Waiting on missing pilot bushing from Novak order to come in, called them up today and they said no problem, should have been there we'll ship it today. 1/2 hr later I had tracking confirmation of it shipping out today.

:chug:

~ Jr
 
Remember how I said my clutch was smoked?

attachment.php


attachment.php


:D:D

Thats all for now. Was trying to get the flywheel off to be re-surfaced, but the blots were too tight and the harmonic balancer bolt loosened instead of holding the motor... So got to get tricky with that this week.

Waiting on missing pilot bushing from Novak order to come in, called them up today and they said no problem, should have been there we'll ship it today. 1/2 hr later I had tracking confirmation of it shipping out today.

:chug:

~ Jr[/QUOTE]

:)Did you use one of there 1.250" special cross shafts with the o-ring on it?

As far as your flywheel, take a big screw driver or bar and wedge it into the ring gear teeth and a bolt or dowel in the back of the block.........that should hold it. Or if you have a good 1/2" drive air gun that will also take them off.

:D:D:D:D
 
:)Did you use one of there 1.250" special cross shafts with the o-ring on it?

Yes! Got the new intermediate shaft with the o-ring seals :D:D

As far as your flywheel, take a big screw driver or bar and wedge it into the ring gear teeth and a bolt or dowel in the back of the block.........that should hold it. Or if you have a good 1/2" drive air gun that will also take them off.

:D:D:D:D

Going to try the air impact... We had the compressor's cord at work for some welding we were doing. Should be able to get it back off in the next day or so.

I've done the tooth holding thing in the past, but wanted to avoid it if possible...

:cool::cool:

~ Jr
 
So since I've had the flywheel resurfaced. While starting to clean up the rear of the engine, and wondering why it was so dirty... I found the answer:

attachment.php


Seal blown out of the back of the intake... So... Intake had to come off. Luckily I had a new valley pan and seal kit in the garage already from another project.

So the intake came off and got everything cleaned up...

attachment.php


attachment.php


attachment.php


So another set back on getting the Transmission in...

Which, I now have found may take longer...

I'm testing some stuff out on it when I realize I am not able to move the input shaft at all (rotate it) :confused::confused: Now I'm confussed as I assume it should be able to spin freely...

So another call to novak this morning soon...

:chug:
~ Jr
 
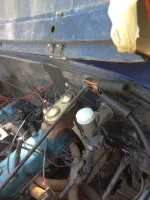
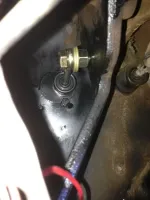
I also began to lay out for my master cylinder for the new hydraulic lutch linkage system.

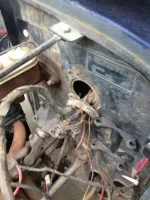
I found the harness would have to be moved, so began there:

attachment.php


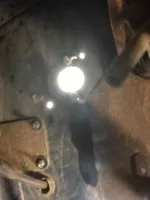
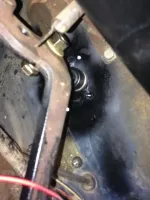
Have the wiring all removed and the hole opened, and began looking at the master cylinder push rod that will hook to the pedal. Looks to be a little short...

I'll have to read up a little more on placement and length determination... Not as easy as I was thinking it would be.

So al in all I have 4 "major" projects going on with her at once. She's definitley under the knife!

Can't wait to have al these things done and get her on the road again with the new tranny and suspension!

And then get her off road again :cool:

:chug:
~ Jr
 
With how far your into it Id be tempted to just pull the engine , regasket and paint it right away. Then while the engine is out clean up the firewall and inner fenders , then... :D
 
the "then" is what I'm afraid of... :eek:;)don't have the money to build the new frame and new dash and re-wire the jeep and rebuild the AMC 304 how I want to and........

lol :drool:

I just need to get her back operational for a while, before she ends up parts in my garage for years...

:chug:
~ Jr
 
I just need to get her back operational for a while, before she ends up parts in my garage for years...

:chug:
~ Jr
:eek: Don't let that happen.:D Just keep chugg'n along, you'll have it done in no time. :chug: Just remember "it's a jeep thing"
 
Just giving you :dung:. I want to see it back out on the trail for you. I cant wait to here you gush about the new Transmission and lift. :chug:
the "then" is what I'm afraid of... :eek:;)don't have the money to build the new frame and new dash and re-wire the jeep and rebuild the AMC 304 how I want to and........

lol :drool:

I just need to get her back operational for a while, before she ends up parts in my garage for years...

:chug:
~ Jr
 
soon :drool::drool::drool::drool:

:D:D
~ Jr
 
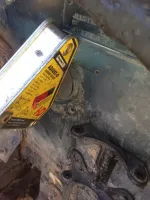
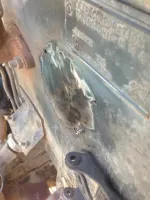
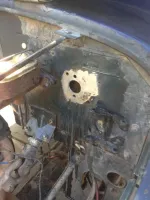
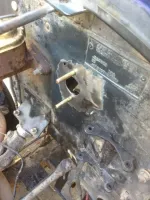
So I continued with my clutch conversion last weekend. If you remember I had the wiring removed from the hole through the firewall, and needed to patch it up to make the new mounting hole for the clutch master cylinder to mount. This area is already double plated for reinforcement, so we figured it would do as is without additional reinforcement. (We shall see :D)

WiringHole_zpsf9b4e8c6.jpg

We cut a 3/16" patch plate and welded it in place:

Patchinghole2_zps3480d817.jpg

HoleWelded_zps1b5ee79e.jpg

Then we used hole saw and correct size drill bit to make the mounting and though firewall holes:

Drilledout_zpsbc8d2b54.jpg

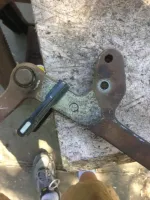
We removed the pedal and drilled it after checking our marks one last time:

PedalDrilled_zps0ed22e3d.jpg

Then we did some more test fitting and mock installed it:

Testfitting_zps1360db4d.jpg

Testfitting3_zps554f2c3e.jpg

And welded the studs up from inside firewall:

StudsWelded2_zps1651252b.jpg

Studswelded_zpsb20755d3.jpg

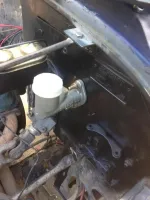
And finished by painting all surfaces and installing pedal and master cylinder for the clutch system:

Finalfinishedinstall_zps7bc13268.jpg

Finalfinnishedinstall2_zpsd5739faa.jpg

FinishedInstall_zps69209ef0.jpg

So that part of the project is completed... Now I need to make a new wiring hole and get a good grommet to protect wires. And continue on with the SM420 install.

:chug:

~ Jr
 
Ok school me on the Hydraulic clutch install. Is it mainly to get rid of the pop apart bell crank linkage? It seems like alot of work to me. Im probably missing something.
 
you got it... a lot of work, but i really hate having my clutch linkage screw up on the trail and it seemed to put a lot of stress on my clutch disc too at times, just a theory but makes me wonder if it helped burnout my clutch disc too...

I'd get twisted on some rocks though and the clutch would not disengage enough to change gears and at the same time, would not hold enough to still go forward...

This is also supposed to be a nice smooth operation and not as stiff as some cable conversions can be. I remember reading about the chain conversion which looked sweet from advanced adapters, but thought it was kinda exposed...

So I went with hydraulic instead.

I had changed and tweaked on the linkage enough and this last trip made my mind up for me... I was done with linkage...
 
I'MMMM BAAAAACCKKK!

:D:D

Been busy as all :censored: with a new position at work!

Keeping me busy my 50hrs / week.

I'm still going through some issues with my Novak order that I am hoping to have sorted out in this next week and a half before my next open jeep working on weekend!

I'll have some updates soon!

:chug:

~ Jr
 
So... I've been working on it a lot, and neglecting to update this...

I'll try to breeze through quickly... :D

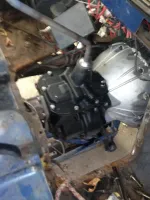
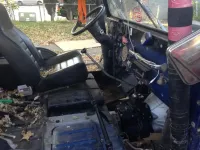
Installed the SM420 after many issues with the Novak "Kit" I received. The bell housing and clutch release fork needed modification. I had to grind a BIT of material out of the clutch fork in order for it to clear the bolts and rear face of the inside of the bell housing. After I decided to just do it instead of monkeying around further with Novak, it went rather quickly. I also had to file out the area for spring to attach on the pivot ball pillar as it was left unfinished before getting to me. I'll say, Novak was more than helpful and patient while going through all of this, I'll give them that, but the fact I needed to "customize" a kit designed for my rig, irritated me.

Here's some mics pics from that portion of the project (not real good story photographer... :cool: )

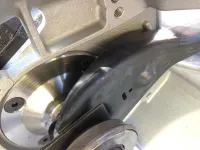
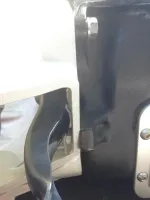
Clearing issues with release arm:
IMG_0422_zpsbbb38149.jpg

IMG_0424_zps91cf7db8.jpg

Here's some test fitting:

IMG_0482_zps21289813.jpg

Bending shift rod:

IMG_0486_zps7846abb0.jpg

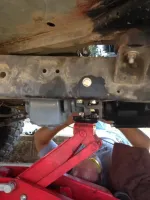
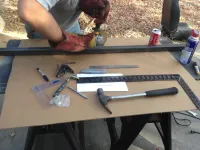
Cross member / tranny mount build:

The frame adaption for mounting:

IMG_0504_zps8e03444c.jpg

Starting the cuts:

IMG_0505_zpsc5ecd194.jpg

Semi - Finished product:

IMG_0512_zps56698be4.jpg

IMG_0514_zps78998da5.jpg

More to come...

:chug:
~ Jr
 

Jeep-CJ Donation Drive

Help support Jeep-CJ.com by making a contribution.

Help support Jeep-CJ.com by making a contribution.
Goal
$200.00
Earned
$25.00
This donation drive ends in
Back
Top Bottom