• Hello Guest, we are proud to now have our Wiki online that is completely compiled and written by our members. Feel free to browse our Jeep-CJ Wiki or click on any orange keyword when looking at posts in the forum.
    To dismiss this notice
    click the top right X.

What did you do to or with your CJ today?

What did you do to or with your CJ today?
So I keep using my notepad to write down the miles at each fill up. You never know when the sending unit will :dung: out.

I use 1 sheet of post it pad and scotch tape it to the dash and write the mileage and date. That way it is off to the right and next to the white knuckle bar and in sight so I don't forget when to fill up.
 
I use 1 sheet of post it pad and scotch tape it to the dash and write the mileage and date. That way it is off to the right and next to the white knuckle bar and in sight so I don't forget when to fill up.

I have a note app on my cell phone that I put my odometer reading and fuel added into as well as a spreadsheet on my google drive that I use to automatically calculate my mileage.
 
Removed the stock fuel tank to so I can work on all new fuel lines and a new 21gal tank from MTS. Found out I was literally driving a ticking time bomb. Fuel lines were run along the exhaust for roughly three feet. Only line connected was the feed line. Return line and vapor line were capped off with bolts on one end and mud on the other. Called it a day when it came time to pulling the old line out. Need to figure out how to cut the lines into sections to get them out easily. I have some nice new rubber coated NiCopp lines ready to shape and install. Having a fuel return line and vapor line to my new to me vapor canister will be nice.

3bf23aba8d6a558ef0a79f4dca699d6f.jpg
36ec04beb0d9ae45db3bed27a51d67c4.jpg


Sent via Google translate using braille through Tapatalk
 
I am very curious to see how this goes with you as I will be doing the same thing next month after i get mine through inspection and make it past my son's wedding in 2 weeks. I have had the tank sitting in my basement since February but have had zero time between HH6 keeping me busy for the wedding, work, and fixing other issues on the CJ to get it ready for inspection.
 
I am very curious to see how this goes with you as I will be doing the same thing next month after i get mine through inspection and make it past my son's wedding in 2 weeks. I have had the tank sitting in my basement since February but have had zero time between HH6 keeping me busy for the wedding, work, and fixing other issues on the CJ to get it ready for inspection.

So far the only real issue is the filler neck on the new tank is a different size than OEM. I need to call MTS and see if they have a part number for a new filler tube that will allow me to keep the OE filler hole/cap assembly. The new filler hole looks like it would need a 2.5" (or 2.25", I didn't measure) ID hose. The old one was about an inch. Vent hose on the filler side is the same though.

The last time I talked to them, they said the 76s had both the smaller and larger holes...flip a coin on what you got. They were pretty helpful the few times that I called, so I don't think I'll have a problem getting what I need from them.
 
They were pretty helpful the few times that I called, so I don't think I'll have a problem getting what I need from them.

Quick update...Just got off the phone with MTS, and they suggested sending a different tank with the correct filler and vent holes instead of jacking around with different hoses, filler, and bracket. They're sending me the new one this week and I'll be returning the tank with the correct size holes. Less of a PITA than to get a new filler and hoses. I'm just covering shipping of the new one and they're sending me a return label for the old one. I'm glad they didn't have me pay for the new one and refund me when they got the old one back.

FYI, the part number for the 2 1/4" filler is 50XL; 1" filler is 51XL. Otherwise tanks are exactly the same.

You might want to doublecheck and make sure what you have before you get into the project and realize you need different stuff. I know it takes a while for you to get parts over there.
 
I will do that. I am replacing everything so I will mock the new one up in the basement before I tear my old one out.
Thanks for the tip

Sent from my ALE-L21 using Tapatalk
 
I will do that. I am replacing everything so I will mock the new one up in the basement before I tear my old one out.
Thanks for the tip

Sent from my ALE-L21 using Tapatalk

If your vent tube runs all the way to the filler, then you need the 51XL.

If your vent rube runs to to the filler hose, you need the 50XL.

That's the easiest way to check.
 
Cut and pulled the old fuel lines out. What a PITA. I'm glad I found my mini tubing cutter. My knuckles and back of my hands are torn to hell though. Ran the new lines and have everything ready to go for tank install when the right one shows up on Thursday.

One thing I noticed when I was under there is making me pretty concerned. The rear calipers that I just swapped in have a built in parking brake, and the way they're oriented is scaring me. They're about 2-3" below the bump stops on the bottom of the frame. I either need to remove the bracket and rotate it (if that's even possible) or look to go with a 4" lift instead of the 2.5" that I have already. If that rear axle moves more than 3" up relative to the frame, it'll activate that parking brake and/or smack the daylights out of the caliper.

My rear axle (Dana 44 ) is rotated up about 17 degrees because the PO cut and re-welded the spring perches so the pinion points up at the Transfer Case output. That difference in angle puts the caliper closer to the bottom of the frame.
 
Mine shows about 1/3 when full.

Does your engine temp show you run'n on the warm side(needle past the 1/2 way of it's sweep)?
If so---Run a dedicated GND wire from the dash panel, to the NEG(-)battery terminal.
You want 10 gauge stranded wire for this.
LG
 
Does your engine temp show you run'n on the warm side(needle past the 1/2 way of it's sweep)?
If so---Run a dedicated GND wire from the dash panel, to the NEG(-)battery terminal.
You want 10 gauge stranded wire for this.
LG

Thanks LG. In the middle of working the grounds now. Last weekend battery neg to block and main ground strap on motor mount to frame came off to be cleaned any rust removed. Next is what you suggested. Then maybe next time I have the tank out and try adjustment of the float out of the tank. As far as the temperature gauge goes, that has always worked great. Gas gauge never really bothered me. I know I'm good and safe at 200 miles and tempt fate starting around 230 miles. :)
 
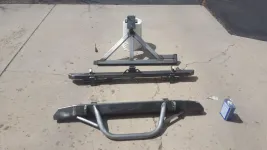
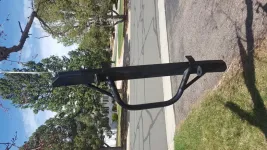
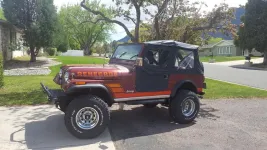
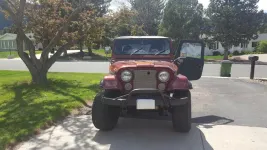
Received a front and rear bumper from Dirt Worx Fabrication. Chrome front and rear bumperettes, stock parts are going by the wayside easier these days. Disassembled what would come apart then sanded everything with 320 grt. wiped with tack cloth I cleaned it all down with mineral spirits and let stand for a day. Three coats of primer followed by three of rustoleum textured black rattle can. All of the hardware provided, it mounted up to the old holes with a little help from a spud wrench.
 

Attachments

  • 20190515_145104.webp
    20190515_145104.webp
    95.9 KB · Views: 43
  • 20190409_134318.webp
    20190409_134318.webp
    55 KB · Views: 57
  • 20190415_122952.webp
    20190415_122952.webp
    97.2 KB · Views: 51
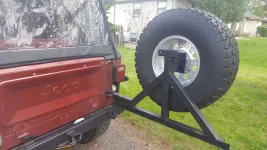
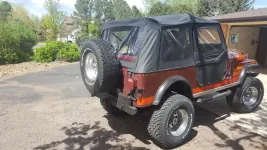
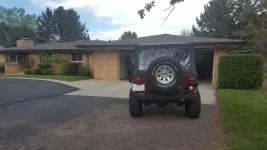
There wasn't much of a weight change... until I added the spare tire that has been in my garage for too long. Finally!
 

Attachments

  • 20190515_145451.webp
    20190515_145451.webp
    94.1 KB · Views: 51
  • 20190515_145320.webp
    20190515_145320.webp
    97.8 KB · Views: 47
Also added the new top. Word of caution, the paddle handles that were sent are never going to work. Salvaged the old style from the last doors and used them instead.
 
Good, solid welds, I didn't wait forever, Very happy with the product!
 

Attachments

  • 20190515_145258.webp
    20190515_145258.webp
    91.4 KB · Views: 69
  • 20190515_145427.webp
    20190515_145427.webp
    91.3 KB · Views: 57
Lookin good!!!!

It does look good...

I talked myself out of that tire carrier awhile back, since...with no tailgate, I didn't need a swingout...hard to beat the quality for the $

Thought about having him do a fixed one that I could just tack on
 
So, in addition to a few things I just did over the last several days that I should have done back when I first got her (water pump, thermostat, alternator, radiator), I finally got it mounted up after several months of piecing it together...just waiting on line, fairlead and solenoid

Brick by brick, my citizens...LOL!
 

Attachments

  • IMG_0139[1].webp
    IMG_0139[1].webp
    95 KB · Views: 69
All the body mount bushings on my Jeep were worn out, split, falling apart etc. Sooo, I figured if I was going to replace them I might as well replace them with 1" body lift bushings.
I ordered the Daystar 1" body bushing kit. I started spraying copious amounts of PB Blaster several days in advance. But almost every one of the captive nuts spun trying to get them out. One bolt broke with very little effort and when I removed it the middle of it was about as big around as a tooth pick. A couple of the body mount brackets were rusted out pretty bad so I cut some 3X1/4 flat stock drilled a 1 1/4 hole for the bushing collar to go in and welded them on.
The two rear mounts [position 6] were in bad shape as well so more cutting, welding and drilling was required for them.
I was also shorted eleven washers in my kit so I headed to Lowes for replacements. The only washers close to what I needed were a little thinner and not quite as big around as what I needed but I am going to temporarily use them until DayStar sends me the correct ones.
All in all what should of been a one day job took all of two days and i'm still going to have to loosen all of the bolts again, jack the body up and replace the wrong washers.
On a side note the Jeep looks a lot better and no adjustments were needed with the steering shaft or clutch linkage. I didn't have to worry about the fan shroud as my Jeep doesn't have one.
 
Spent the better part of the last 2 days finishing my 21ga tank upgrade from MTS. The correct tank showed up earlier this week and I ran all new lines. I mounted the new to me vapor canister, but need to figure out exactly where to run the vacuum lines.

When I got all the rubber lines clamped on, I went to fire it up and it would just crank and crank. I thought I may have missed a connection, so I traced everything but no issues. Took the sir cleaner off the carb and pumped the gas and fuel sprayed as it should, so it wasn't a fuel issue.

I went on to check the wiring and one of the wires on the coil broke off at the connector. Crimped on a new connector and it fired right up...after spewing a little fuel out of the tail pipes...she was a little soggy in the engine from cranking it too much.

Took a picture of my speedo showing the fuel gauge actually showing full for the first time since I've had it. The old tank had some sender/pickup issues.

I also put in the correct style fuel filter with the return outlet.

I'm going to start keeping track of gas mileage to see what I end up getting.

BTW, those are some sweet bumpers. Next project will be a set from him for mine. Not a fan of driving around without a spare. I think I'll get the hi-lift and Jerry can mounts too. I don't have a tailgate either, but I'll probably get the swing carrier because I load the boys in the back through the rear...plus it's just easier to grab stuff in the back from the rear.
dcf267a4a4ca9e1e40c7f5dd53f0fb37.jpg
98b8fa094654b6bf73e4bf5aa8e18e4d.jpg
e1e60611f30e6647431fbea62a3873ef.jpg
fde2831f508620ad338e52e88d7e3a73.jpg
462785cb1bba10d20778b7b797a97a50.jpg
42400d827b6f0d1740f6f8e70d73d29d.jpg
3c7c286fcf9246b6b6658d9cacee1eea.jpg


Sent via Google translate using braille through Tapatalk
 

Jeep-CJ Donation Drive

Help support Jeep-CJ.com by making a contribution.

Help support Jeep-CJ.com by making a contribution.
Goal
$200.00
Earned
$100.00
This donation drive ends in
0 hours, 0 minutes, 0 seconds
  50.0%
Back
Top Bottom